|
|
Post by petea on Jun 12, 2021 10:02:26 GMT
When fully loaded it is a two handed operation: for safety!  |
|
|
|
Post by Slinger on Jun 12, 2021 12:34:11 GMT
That should do the job. But can you put fewer than four slices in it?  Both sides work completely independantly, and there's nothing to stop you putting just one slice in one side. It's also got a "bagel" function, so that it only toasts one side of whatever you put in it. Most importantly (to me, anyway) it's got a proper "high lift" function. My current DeLonghi was supposed to have one, but I still have to dig crumpets out with a knife, or a fork. Also, as far as I know, Dualit are the only toasters that allow you to lift the toast out to see how it's progressing without having to cancel the program first. It's sort of a "semi-pro" toaster. Anything above its quality and you're starting to get into the pukka catering range, at even more ridiculous prices. |
|
|
|
Post by petea on Nov 6, 2021 16:22:14 GMT
I haven't bought a machine tool for what what seems like months now! However, that was rectified this morning. I had seen a nice Lorch LAS precision lathe advertised for sale in Berlin and nipped in on the S-Bahn this morning to take a look. It came from the technical department at one of the universities in Berlin and is in amazing condition given that it was made in 1971: barely used by the look of it and with most of the accessories that were made for it. The deal was done and it is paid for and will be delivered later this month, after I return from the UK. Then I just need to get it into the basement. The total width of the cabinet might only be 80 cm, but it weighs 150kg! It is configured for 3 phase operation at present which I have in the studio, but not in the basement (it could be done, but would be a real hassle). However, I plan to run it from 220V using a variable frequency drive and so provide it with variable spindle speeds rather than just the speeds provided by the 2-speed motor and pully combinations (it has a back gear also for very low speeds). 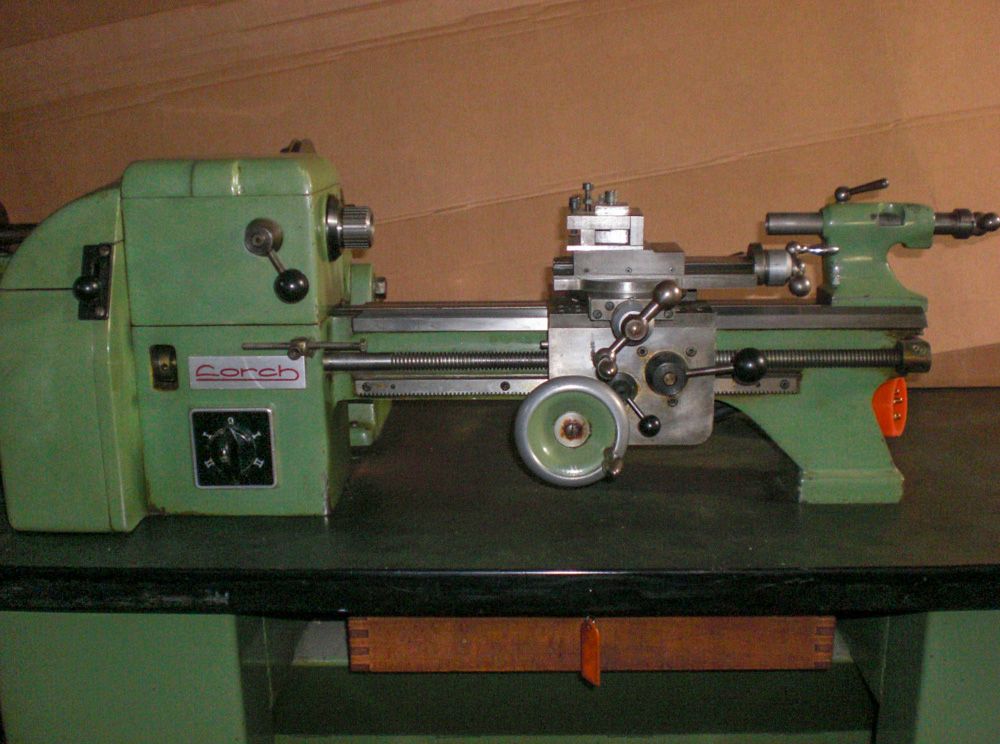 |
|
|
|
Post by MartinT on Nov 6, 2021 16:54:47 GMT
Very nice bit of kit. You'll soon be making JohnnyQ90 type videos on YouTube! |
|
|
|
Post by petea on Nov 6, 2021 17:01:21 GMT
|
|
|
|
Post by julesd68 on Nov 6, 2021 18:52:30 GMT
How exciting - I got a milk thermometer today so as to increase my chances of making decent frothed milk for my coffee.  |
|
|
|
Post by Slinger on Nov 6, 2021 19:27:20 GMT
That should do the job. But can you put fewer than four slices in it?  Both sides work completely independantly, and there's nothing to stop you putting just one slice in one side. It's also got a "bagel" function, so that it only toasts one side of whatever you put in it. Most importantly (to me, anyway) it's got a proper "high lift" function. My current DeLonghi was supposed to have one, but I still have to dig crumpets out with a knife, or a fork. Also, as far as I know, Dualit are the only toasters that allow you to lift the toast out to see how it's progressing without having to cancel the program first. It's sort of a "semi-pro" toaster. Anything above its quality and you're starting to get into the pukka catering range, at even more ridiculous prices. Just a quick " report back," on my Dualit toaster. Brilliant toaster, and worth every penny. |
|
|
|
Post by petea on Mar 24, 2022 15:10:22 GMT
A couple of new, non-HiFi toys this month. I have had a few things 3D printed via agencies, but have long been tempted by some sort of in-house capability. The problem was that to get the 'resolution' we needed required a fairly large filament printer and I could not (and still can't) justify the space. The same was sort of true also with resin printers, but also having to wash the prints with IPA etc is Okay in the lab, but a pain in the studio. Add to that the limited resolution in small, cost-effective units meant it was still better to outsource the work. However, a couple of shifts in the industry has had an impact on the decision making. Filament printing will still be outsourced as it is not often required and the printers are still too space-hungry. When it come to resin printing a new version of Elegoo's small-footprint Mars printer now has twice the 'resolution' of the previous version making it perfect for both some small work items and model making. Plus water-washable resins are now available and so I don't need to store large amounts of IPA (and dispose of it after use). As a result of the above, I bought the new 4K Mars printer, a curing / washing station and a load of resin. If the results are as good as I hope then I will do the same in the UK. I have set it up in the darkroom as the extractors give 8 air-changers per hour and it is small and light enough to pack away on a shelf when I want to do 'proper' stuff in the darkroom. 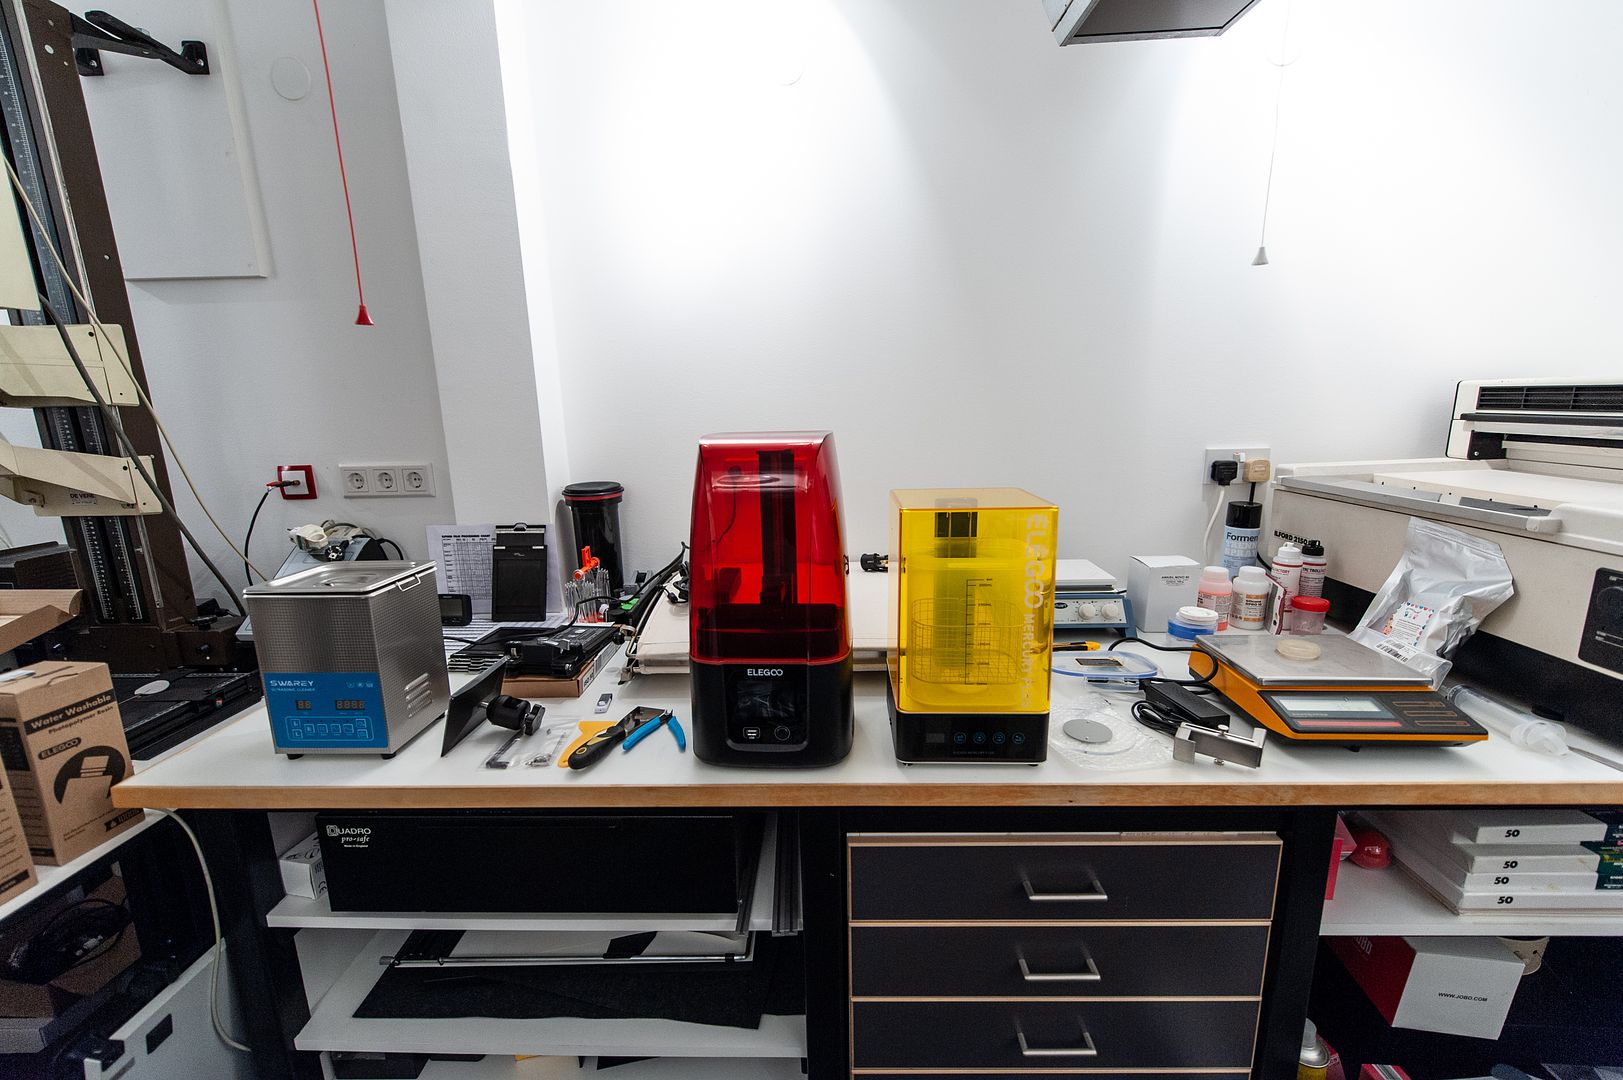 Unfortunately it didn't stop there and I followed up some something else that I have been thinking about for a while; a 3D scanner. I have 2 uses for a scanner. One of course, it to scan objects to replicate / model using a 3D printer. However, I was also keen to buy one that would allow some surface analysis as well and produce models that can be used for topographic analysis. Most of the home machines are just not up to the latter and I really wanted both higher resolution and accuracy than they deliver. The one I kept looking at is the Eigenscan SP, but the interface is Windows only and I have reservations about the turntable. Three-axis, small, high-resolution units cost about 40K Euros and I can't justify that for the use it would get. I had seen the SOL scanners in passing, but had not looked at them in any detail. It seems I should have as San Dimensions are a very serious outfit from Denmark and their SOL Pro scanner is a metrology-grade unit with a resolution of 50 µm and so is perfect for what I want to do. Copyright Kopiersysteme GmbH had them in stock and one turned up today in an absolutely enormous box, luckily about 5 time larger than it need to be, but they were clearly taking no chances with damage during shipping! I have set the scanner up on the copy stand which gives it a a nice stable base and it can connect to the high-specification Mac Mini which is used with the PhaseOne backs and the CCD units on the microscope next to it. In use it lives in a dark 'tent' and breaks down into 3 parts for storage. 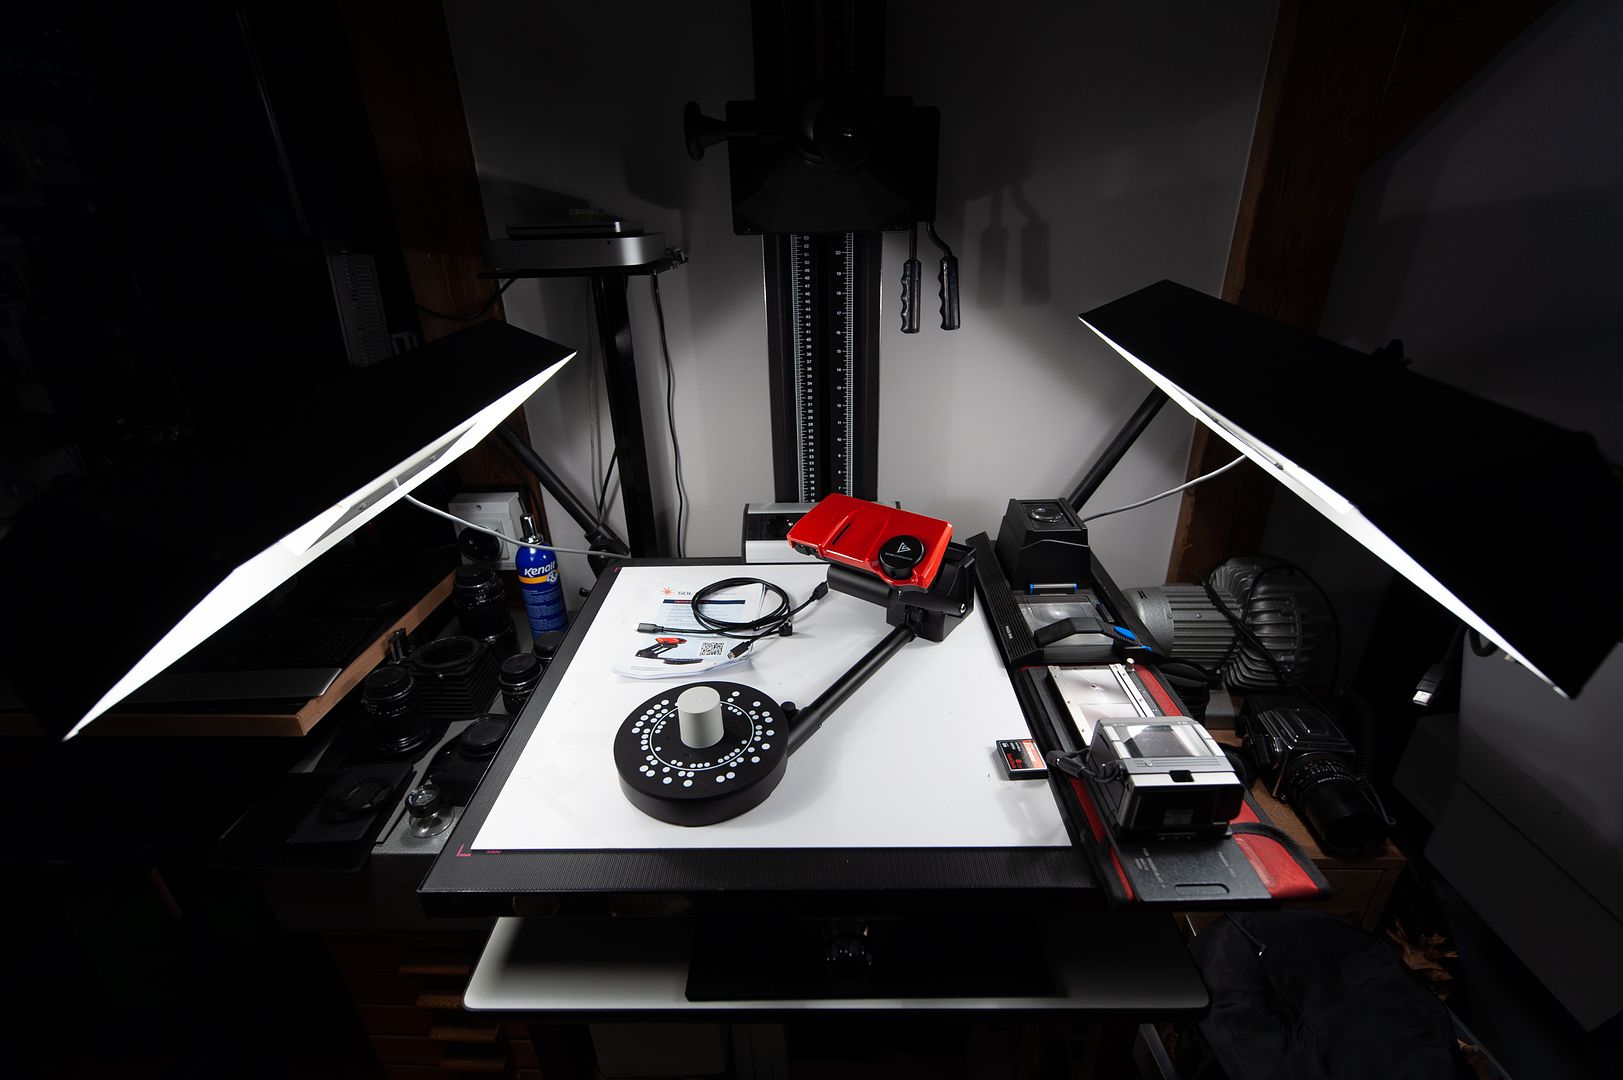 |
|
|
|
Post by MartinT on Mar 24, 2022 15:50:14 GMT
with a resolution of 50 µm <boggle>! |
|
|
|
Post by Slinger on Mar 24, 2022 15:57:09 GMT
Some cracking kit there, Pete. I'm only glad that sort of thing didn't fall into the " affordable" category when I was using McNeel's Rhino 3D software on a daily basis at home, or I would definitely have *needed* a 3D printer.  |
|
|
|
Post by petea on Mar 24, 2022 17:40:37 GMT
|
|
|
|
Post by MartinT on Mar 24, 2022 19:20:46 GMT
"MikroCAD is the first surface metrology system to use structured light fringe projection profilometry to generate 3D surface scans with microscopic level of detail for small volume measurement"
Amazing.
|
|
|
|
Post by MikeMusic on Mar 24, 2022 20:16:04 GMT
The future just arrived !
|
|
|
|
Post by brettj on Mar 25, 2022 6:05:39 GMT
A couple of nice blenders there Pete
|
|
|
|
Post by petea on Mar 25, 2022 16:18:52 GMT
They produce very low calorie smoothies too!  |
|
|
|
Post by brettj on Apr 17, 2022 22:31:35 GMT
Have bought a couple of toys in the last week.
Firstly, a table saw.
Wow. Ripping timber is so easy.
Darn. The old skill saw technique has been banished.
Rattled out 40 lengths in no time.
And finally bought a good DeWalt hammer drill.
Has made things so much easier (and safer).
|
|
|
|
Post by petea on Aug 27, 2022 23:47:37 GMT
I have been looking for quite some time for a very small arc welder, but without any real success. A need to stick some small bit of titanium together reignited the search and I have found a solution. Most MIG / TIG welders are just too big for working with mm and sub-mm size work-pieces and laser welders are just too expensive and are not always the best solution for reflective material. I had looked at pulse / plasma units before, but not properly. However, after a lot of reading and speaking with the folks at Sunstone in the US, it seemed like this was the way to go and so I ordered one. It arrived earlier this week and I installed it today and tried it on a few test pieces (including a pair of titanium reading glasses that had snapped at the bridge). It took a lot less time than I expected to get to grips with the unit and I managed some very tidy welds in titanium and stainless steel, creating a seam in the latter of about 0.5 mm. I'm running low on argon shielding gas though and won't be able to do much more until some more arrives next week. I will also buy a proper cylinder as the MAPP-style ones I usually use don't last that long and throwing out the empties feels so wasteful. Here is the unit (an Orion 100C Pulse welder) set up on a workbench. As you can see, it consists of the welding probe mounted on a microscope head and a control unit. In use you attach one terminal to the workpiece and then touch the workpiece to the probe at the point where the weld is to be performed while looking through the microscope. This triggers the flow or shielding gas and the closing of an electronic shutter on the eyepieces (so you don't blind yourself!). The probe then retracts and an arc is struck, forming a plasma that melts the metal at the joint (plus infill if required). The shielding gas then flows for a little longer and the shutter opens: this all takes a fraction of a second and you can then make another weld to produce a continuous joint if required. The unit can also be used as a capacitance discharge welder by attaching a pair of electrodes to the rear of the unit: one is then connected to one component part and the other to other part that you wish to connect. The 'spot' weld is then made by touching the parts together. I have not tried this yet, but I have a capacitance discharge welder (you can see it in the picture behind the new one) already and it is not something I do that often although it will probably be easier to use for some things. All-in-all a success so far and a versatile unit. Probe and Microscope Head on its Arm
The probe itself can just be seen as the bright 'spike' sticking out of the black (looks blue in the picture due to the LED illuminator) probe holder: it is a 1 mm diameter tungsten needle can can be exchanged for a 0.5 mm one for smaller workpieces. 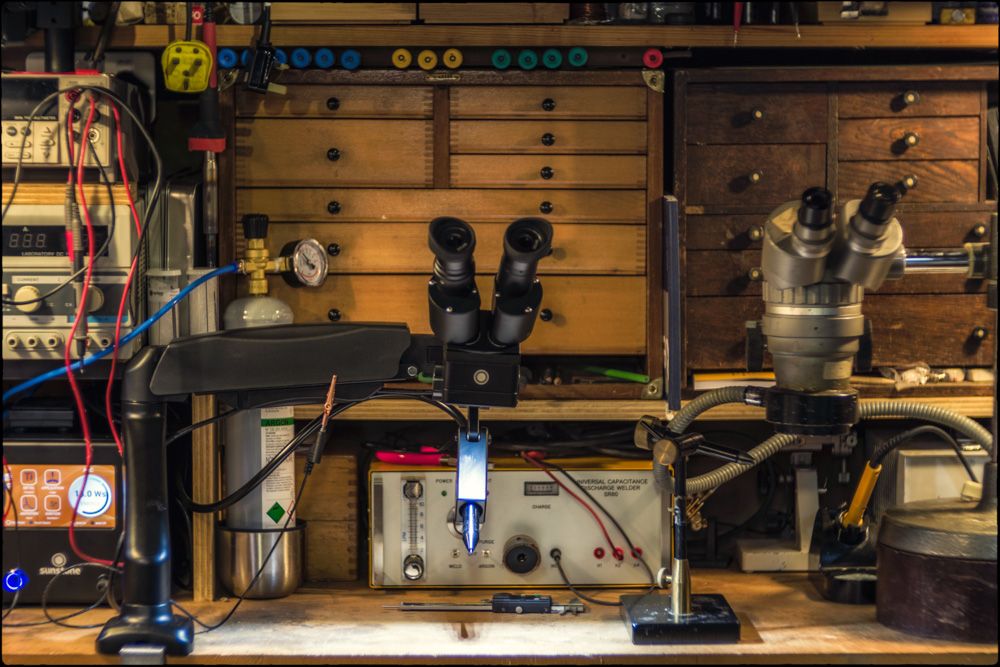 Overview Showing the Control Unit on the Left Overview Showing the Control Unit on the Left The copper crocodile clip that completes the circuit when in use is clipped to the arm for storage in the picture. 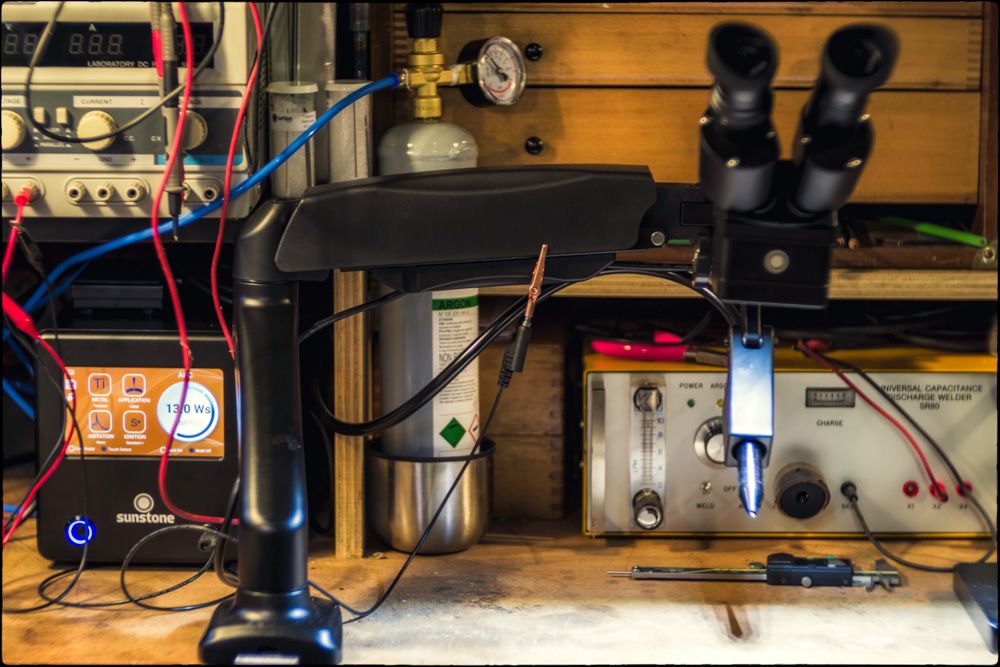 |
|
|
|
Post by Slinger on Aug 27, 2022 23:55:28 GMT
I understood about half of that, but the half I understood sounds bloomin' impressive.
|
|
|
|
Post by petea on Aug 28, 2022 0:02:39 GMT
I was impressed by how easy it was to fix my glasses, that's for sure. I was even able to re-attach the 'blade' of Ina's S/S garden trowel back to its handle with the unit by winding the power up and that is now a much stronger joint than the 3 spots welds that they used in the factory. Mind, the probe wasn't so 'pointy' after - but they supply a diamond disc to regrind them and a bunch of spares.
|
|
|
|
Post by MikeMusic on Aug 28, 2022 9:05:09 GMT
Hmm I have a few tools that need serious fixing  |
|