|
|
Post by MartinT on Aug 1, 2014 14:06:56 GMT
File-Based Audio Streamer Project
See also complete build article here!
This thread will form an ongoing project to build a high quality music streamer from easily available components. The objective is to keep the price low while achieving the highest possible audio quality. We encourage members to consider buying the parts and follow us along an interesting and fun journey from a very basic streamer to something that can form an integral part of your hi-fi system. The total initial cost slightly depends on whether you have cable or wi-fi ethernet, but around £50 ($84) will get you started.
The ethos of the Logitech Touch is what we're aiming at, but at about one-third of its price and still more flexible. The Touch is no longer available, so a project based around it would not have been very appropriate for most members.
The benefit of a streamer, as opposed to an all-in-one music server, is that your music collection can be tucked away somewhere else in the house, taking its audio and electrical noise and heat away from your hi-fi system. The streamer is the only component close to the system and can be unobtrusive, low power, low noise and low thermal output in nature.
Introduction to the Raspberry Pi
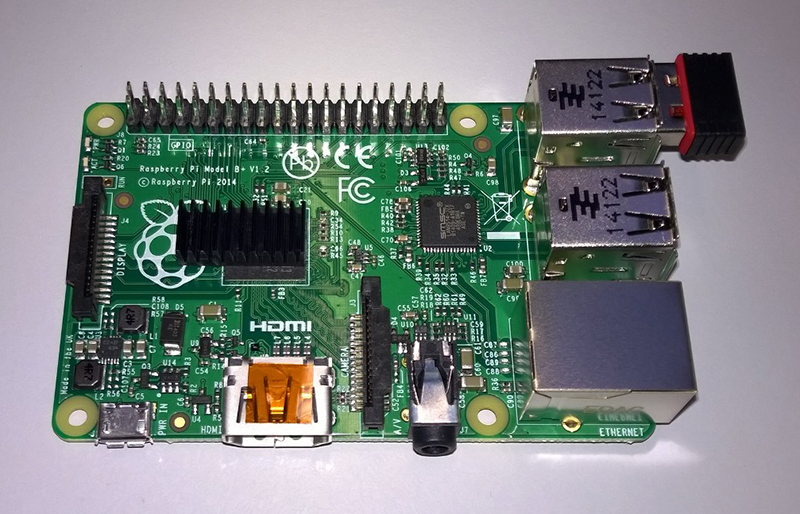
The Raspberry Pi is a low cost single board computer, about the size of a credit card, with a SOC (System on Chip) 700MHz ARM processor. It's designed to run Linux although other operating systems are available for it. An SD card is used for the OS and local storage. You can power up one of these, plug an HDMI monitor or TV in, connect up keyboard and mouse, connect it to your router and be browsing the internet within half an hour. It's a truly remarkable bit of kit.

The version we are going to be using here is the Raspberry Pi B+, the latest model, which includes better optimised USB ports (good for USB DACs) and lower power consumption (good for when we start to experiment with battery power). It is relatively new, so we will have to wait for some nice add-on boards to be released, such as optical/co-ax digital outputs (e.g Hi-Fi Berry Digi and Squirrel Sound Card) and fully fledged onboard DACs (e.g. HiFiBerry DAC and Element 14/Wolfson DAC). They are coming soon.
Selecting the Best Software
There are quite a few software audio streamer solutions for the RPi out there, including Volumio and MPD. For ease of use, great reputation and nice universal user interface, we will be using Volumio. It doesn't require a display, being completely configurable via its web browser interface. It also accesses your music collection via simple SMB shares, so it's very easy to connect to a PC, Mac or NAS file store without any server software. Finally, it's open source and costs nothing.

Controlling it All
One annoyance with the Logitech Touch is the plethora of different apps to control it, none of which have a complete handle on necessary functions and all of which appear to be buggy to a greater or lesser degree. There is also dependence on LMS (Logitech Media Server) being installed on the PC containing your music, a concept best done away with.
With Volumio, all you need is a tablet or phone with a browser, any platform will do. That's it - no app required!
Shopping List
Raspberry Pi Model B+
8GB fast MicroSD card
Case
5V mains power supply or 5V phone extender battery
Also Needed
PC, Mac or NAS store with your music file collection
Ethernet cable or wi-fi network
Laptop, tablet or phone with browser
Everything else will be optional:
I2S board with S/PDIF outputs for external DAC (I'm using the HiFiBerry Digi+ board)
Onboard DAC (there are several models including the HiFiBerry DAC+)
Onboard display
Other ideas
Links
Raspberry Pi
Volumio
HiFiBerry
Squirrel Labs
IQaudIO
The great thing about this project is that it can be taken in easy steps, starting with just simple streaming to a set of earphones and testing everything along the way.
Members are encouraged to contribute their questions and findings to this thread, building up a comprehensive knowledgebase on the subject.
Sections 1. Starting the Build 2. Preparing the OS Boot Disk 3. Finding the RPi Interface 4. Configuring a Share for the Library 4a. Host Computer IP Address 5. Setting Up Wi-Fi 6. Testing 7. Adding More Internet Radio Stations 8. Adding the HiFiBerry Digi+ S/PDIF Module
Glossary of Terms |
|
|
|
Post by Dave on Aug 1, 2014 14:20:01 GMT
I will be watching this with interest Martin as it is a route I intend to explore soon. All my media files are stored on a 2TB WD hard drive so presumably Volumio would be able to access this directly via one of the USB ports. It would also be handy if the Pi could handle HD video via this installation too. Anyway, I'm all ears (and eyes)  |
|
|
|
Post by MartinT on Aug 1, 2014 14:23:57 GMT
1. Starting the Build
This is my Raspberry Pi B+ (henceforth called 'RPi') with a wi-fi dongle already plugged into one of the four USB ports, and a cooling heatsink stuck on the CPU chip (not essential, but I don't want my RPi overheating in its case).
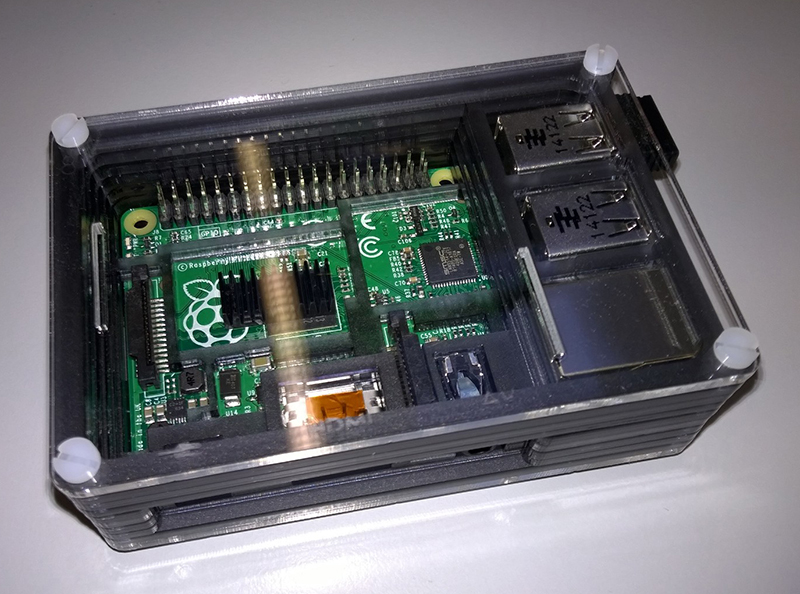
The first thing you will need is a case. Although not mandatory, it will afford protection and prevent you from touching the circuit while it is running. Note that if you intend using either the audio jack (not recommended for sound quality) or USB out into an external DAC, you will not need to modify your case. If, however, you intend on using a plug-in board, for instance to provide S/PDIF outputs, you may need to drill or otherwise cut further openings in it.
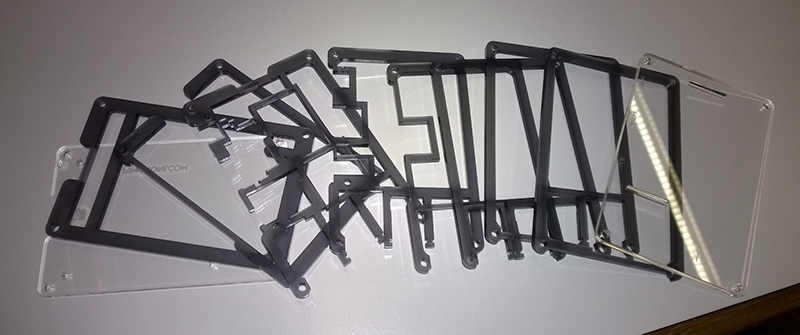
I chose a Pibow Ninja layer case, primarily because it looks nice (there is even a timber version, especially for ChrisB)!
The RPi in its case.
|
|
|
|
Post by DaveC on Aug 1, 2014 14:27:15 GMT
I would like to see a big SSD drive with all the music on it, so stand alone, and iPad/iPhone control ?
But I'm a an analogue engineer !!
Dave
|
|
|
|
Post by MartinT on Aug 1, 2014 14:29:46 GMT
I will be watching this with interest Martin as it is a route I intend to explore soon. All my media files are stored on a 2TB WD hard drive so presumably Volumio would be able to access this directly via one of the USB ports. It would also be handy if the Pi could handle HD video via this installation too. Anyway, I'm all ears (and eyes) I will test tonight whether the RPi with Volumio can access a local USB connected drive.
Volumio is strictly an audio streamer, so there is no video handling in this project.
|
|
|
|
Post by Dave on Aug 1, 2014 14:33:27 GMT
I will be watching this with interest Martin as it is a route I intend to explore soon. All my media files are stored on a 2TB WD hard drive so presumably Volumio would be able to access this directly via one of the USB ports. It would also be handy if the Pi could handle HD video via this installation too. Anyway, I'm all ears (and eyes) I will test tonight whether the RPi with Volumio can access a local USB connected drive.
Volumio is strictly an audio streamer, so there is no video handling in this project.
Thanks Martin.
I could always stick the XMBC based OS (forget what its called) onto another SD card for that purpose I suppose 
|
|
|
|
Post by MartinT on Aug 1, 2014 14:35:20 GMT
I would like to see a big SSD drive with all the music on it, so stand alone, and iPad/iPhone control ? See above as I will check that a local USB drive will work. The SSD would need to be in a powered case with USB interface. The Volumio OS can only be put onto a MicroSD card, an RPi cannot boot from any other type of drive.
iPad & iPhone no problem as the browser interface works fine on them.
|
|
Deleted
Deleted Member
Posts: 0
|
Post by Deleted on Aug 1, 2014 14:44:02 GMT
Having built many of these devices on behalf of customers and know their current limitations I will watching this one with interest.
If you need any assistance regarding this project, you are more than welcome Martin.
|
|
|
|
Post by MartinT on Aug 1, 2014 14:54:04 GMT
Thanks, Tony. I think we'll be tweaking Linux down the line, but for now it's a straightforward build and hopefully will not put off those who have never done this sort of thing before.
|
|
|
|
Post by DaveC on Aug 1, 2014 16:34:09 GMT
OK, does it have a drive controller on board ? If not USB 3
Thanks
|
|
|
|
Post by MartinT on Aug 1, 2014 16:37:35 GMT
OK, does it have a drive controller on board ? If not USB 3 No and no. You have to remember it's a low power 700MHz SOC CPU, designed originally for the education market.
I'll do some USB tests in a mo.
|
|
|
|
Post by MartinT on Aug 1, 2014 17:18:37 GMT
2. Preparing the OS Boot Disk
The RPi boots from a MicroSD card. You will need to buy one - I bought an 8GB Class 10 PNY card, but anything around that size and speed should do. Mine looks like this:
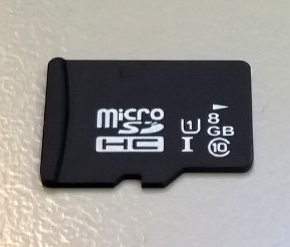
The size is more than enough for Volumio and the Class 10 speed (10 in a broken circle) ensures that the initial boot time is fast.
Now you will need to download two files: 1. The latest Volumio image v1.5 for RPi 2. A copy of Win32DiskImager, or a similar image copier for Macs or other platforms (there is a very nice guide to copying the image on a Mac here)
Download both files and unzip the Volumio image, putting it somewhere temporary for the disk image program to use.
Put the MicroSD into your card reader slot (you may need to use an adapter, frequently supplied, to convert it to a full size SD card) and use Win32DiskImager to copy the image file to your MicroSD card. Progress should look something like this:
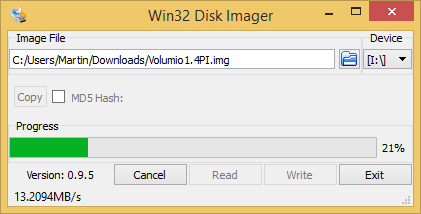
Note the speed in the bottom-left corner is somewhat less than the claimed 20MB/s for a Class 10 card! The version of image I am copying is Volumio 1.4Pi. When you get a comfirming 'Ok', the OS is ready and you can insert the MicroSD card into the RPi. |
|
|
|
Post by MartinT on Aug 1, 2014 17:37:59 GMT
USB File Storage I can confirm that the RPi/Volumio combo does indeed read local USB storage, so you can run it as a self-contained music server. You will, of course, still need an Ethernet cable or Wi-Fi connection in order to be able to control it from your laptop/tablet/phone. |
|
|
|
Post by Dave on Aug 1, 2014 17:39:06 GMT
USB File Storage I can confirm that the RPi/Volumio combo does indeed read local USB storage, so you can run it as a self-contained music server. You will, of course, still need an Ethernet cable or Wi-Fi connection in order to be able to control it from your laptop/tablet/phone. That is excellent news Martin, thanks for checking |
|
|
|
Post by MartinT on Aug 1, 2014 18:20:47 GMT
3. Finding the RPi Interface
For this part of setting up, you must use an ethernet cable and plug it into the RPi. Go sit near your internet router and do this bit there, unless your house is wired for ethernet. Once you have done it, you will be able to configure wi-fi at a later stage should you need it.
Make sure your MicroSD card is plugged in, plug in the ethernet cable and power up the RPi. Give it a couple of minutes to boot up first time.
The RPi will have collected an automatic IP address from the router, this process is known as DHCP. The trick is finding it so that you can browse to the RPi and start configuring Volumio. Depending on your router, the RPi will most likely have collected an IP address in the range 192.168.x.x or 10.1.x.x. This is not helpful as you could be there all night searching for it.
Volumio suggests browsing to volumio.local/ but that doesn't always work. Try it first (just type exactly the address shown in yellow into your browser address bar). If it doesn't, continue as below. If you see the Volumio interface appear, then you're done for this section!
Since your router has issued the IP address via its built-in DHCP, the best thing to do is to go to the router (you do know how to browse to your router, don't you) and find out directly. In my example below, I have a BT Home Hub and have browsed to 192.168.1.254 (as that is the default address for BT Home Hubs), entered the advanced menu and gone to the DHCP Table, as below:
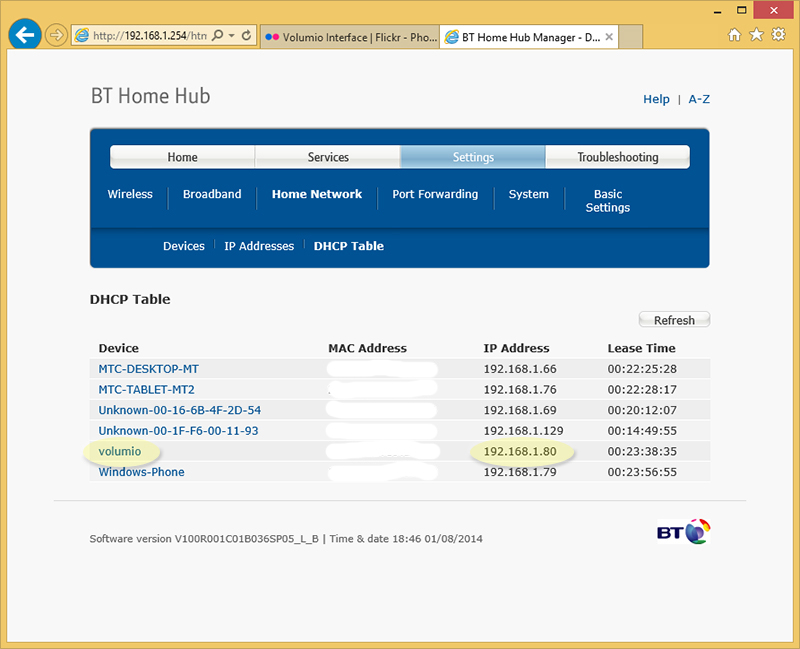
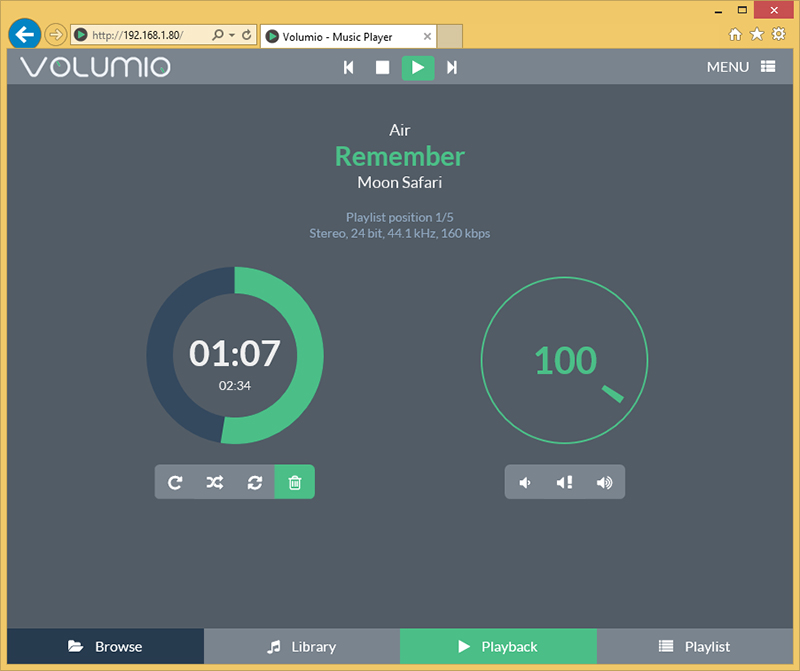
You will see above that my RPi/Volumio is located at 192.168.1.80, so I can now browse to 192.168.1.80 in my browser. Your IP address is not likely to be the same as mine! If you've done everything right, by means of one of the two yellow methods shown you should see the Volumio interface pop up. In my example, I'm already playing music but yours will show blank and is now ready to configure.
|
|
|
|
Post by MartinT on Aug 1, 2014 20:43:55 GMT
4. Configuring a Share for the Library
There are two key steps here: set up a share in your selected host machine, then configure it in the Library section of Volumio. The former is going to depend greatly on the machine type and version of OS you have. Here's my example for Windows 8.1, but the essential methodology (if not the exact steps) should be the same for Mac or Linux machines or a NAS server.
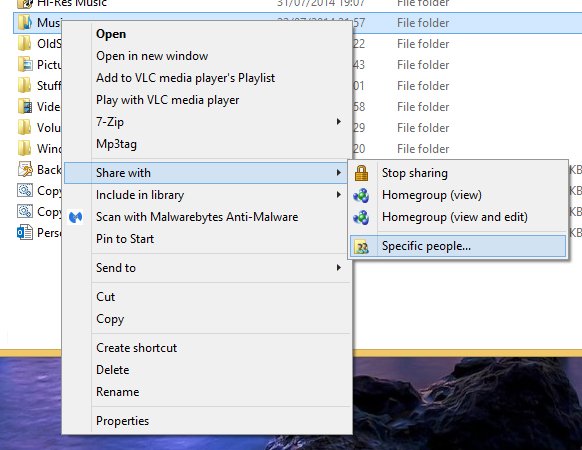
Go to your top level folder or drive containing the music folders & files. Mine is called simply Music. Right-click, select Share with and then Specific people...
Then you are presented with a Window where you are asked who to share the contents with. It's easiest to select yourself, otherwise you will have to go to the Control Panel and create a new user specifically for the share. Here you can see that I've selected my own account, which automatically gives a permission level of Owner. For other accounts, you need only select Read permission.
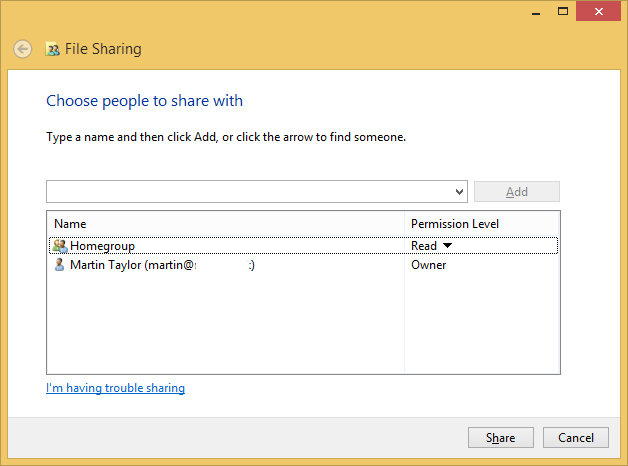
Once you click Share the system will take a few moments to apply the permission to every folder and file in the menu tree. Make note of the Share name (usually the folder name). You have now set up the necessary share on your system. Now go to the Volumio interface and select Menu | Library.
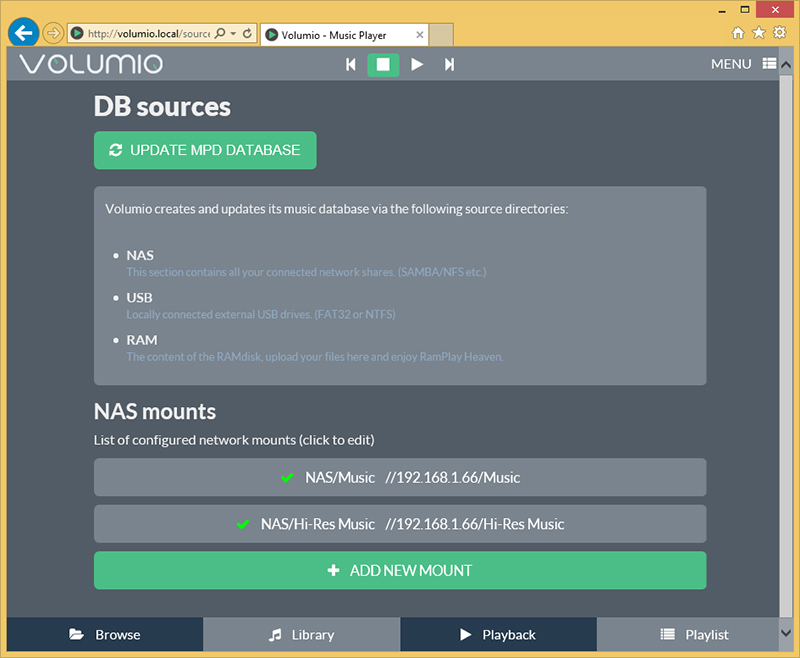
Now scroll down to NAS Mounts and click ADD NEW MOUNT. Here you will be presented with a screen where you fill in the share information, some of which you created above.
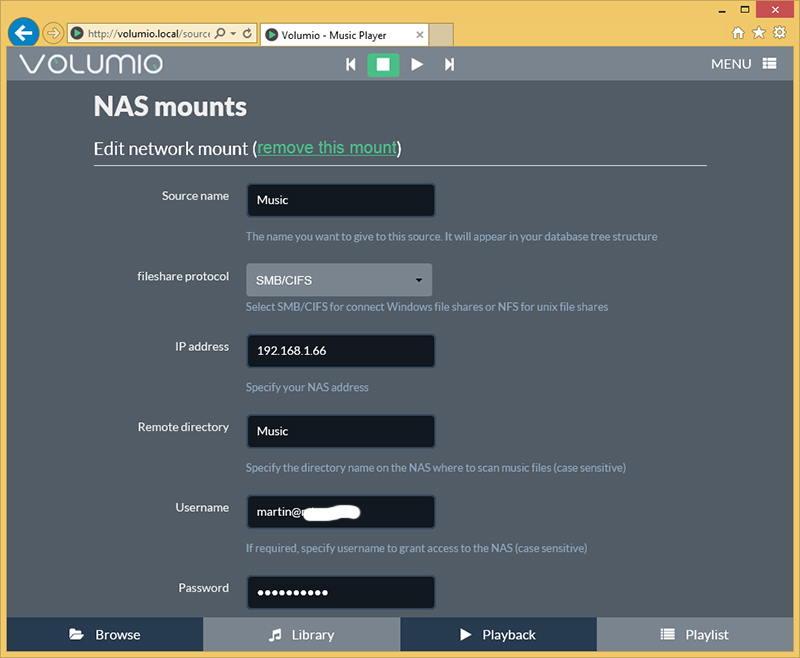
Give the Library a name (I've simply called it Music); select SMB for the file share protocol; the IP address is that of the host PC, Mac or NAS box, not your RPi/Volumio device (see Section 4a). The Remote directory is the Share name of the host machine, in my case Music. Username and Password are the credentials you have used in setting up the share - the Windows account used in my example above. Click SAVE MOUNT. You are returned to the Library screen.
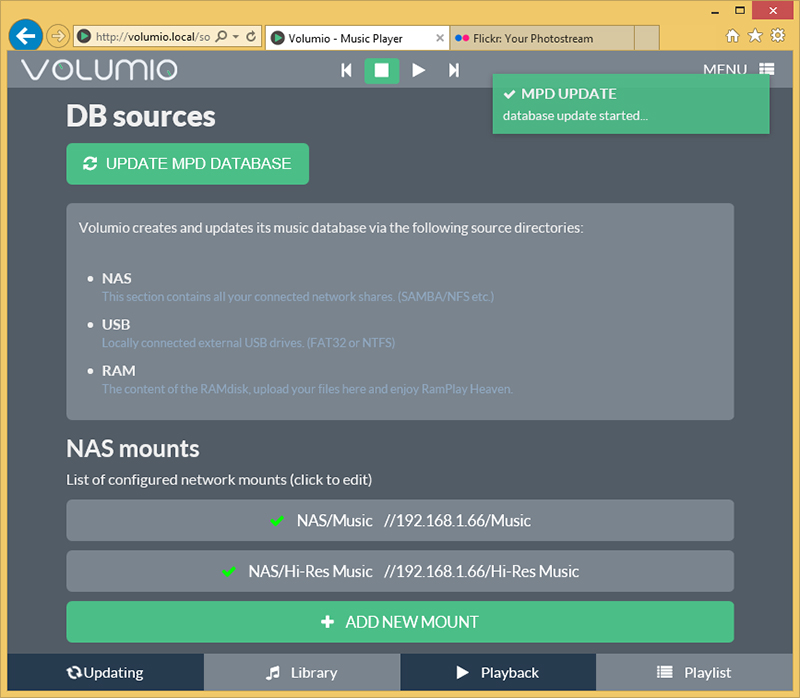
Click UPDATE MPD DATABASE to start scanning your share files and build an internal list in Volumio. If your collection is large, you may need to have a cup of tea at this point and congratulate yourself on reaching the point where you can start listening to the system. |
|
|
|
Post by MartinT on Aug 1, 2014 20:57:59 GMT
4a. Host Computer IP Address
If you don't know the IP address of your host machine, in Windows 8.1 go to Control Panel | Network and Internet | Network Connections. Right-click on the active ethernet connection, select Status and then Details...
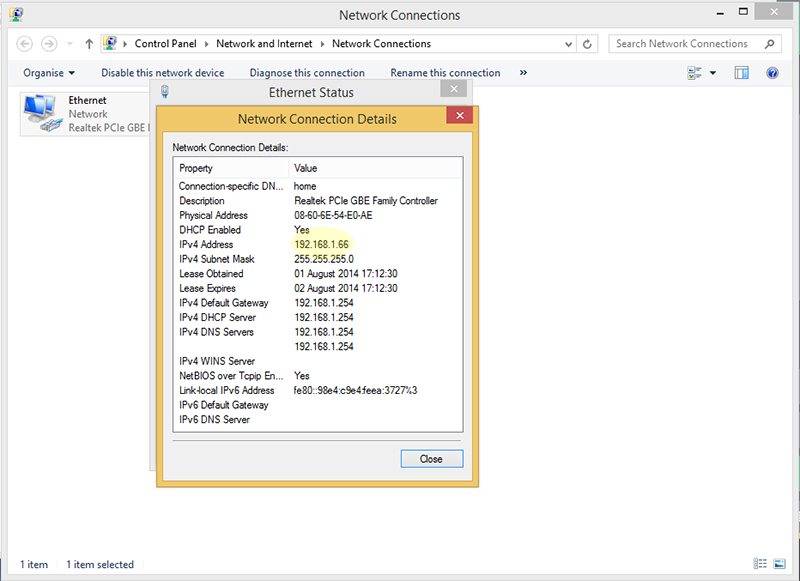
Shown above is how I found my host computer's IPv4 address (192.168.1.66) - this is the one you need.
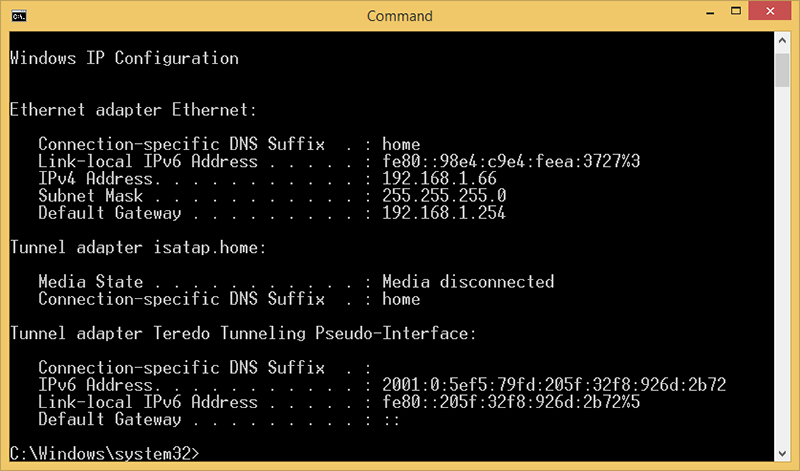
Alternatively, and for older versions of Windows, open a Command prompt (Win-R, cmd) and type ipconfig <Enter>. This will also provide your IP address (IPv4) as shown below.
|
|
|
|
Post by Dave on Aug 1, 2014 20:59:06 GMT
Is it the same for Win7 Martin?
|
|
|
|
Post by MartinT on Aug 1, 2014 21:01:07 GMT
Is it the same for Win7 Martin? I don't use W7 any more but I'm pretty sure it's the same path in Control Panel, Dave. You're looking for the Network Adapters. |
|
|
|
Post by Dave on Aug 1, 2014 21:04:17 GMT
Righto, cheers. I'm excited about this because its the sort of thing I've been looking for to replace the old 'boiler' sitting on the floor...  |
|


