|
|
DIY
Aug 20, 2022 9:07:46 GMT
Post by MikeMusic on Aug 20, 2022 9:07:46 GMT
Thanks guys
and loads of different models, spares
Sounds good
|
|
|
|
Post by petea on Aug 26, 2022 14:38:25 GMT
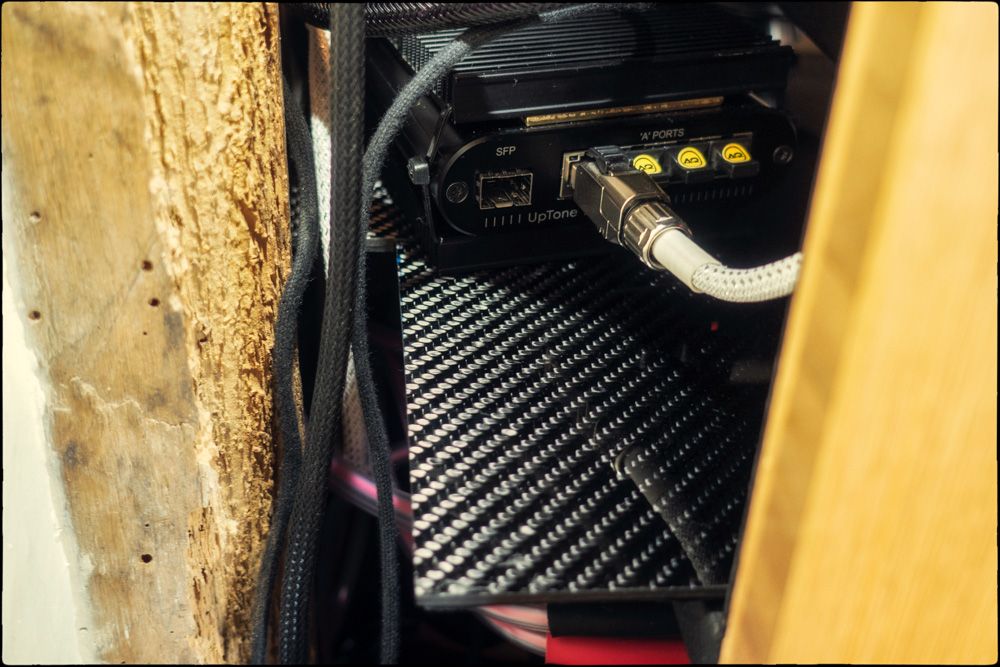
I have been thinking for while about changing some of the standard particle board shelves in the racks for something else. I have used bamboo ply a lot in the various modifications and it is a superb choice as it is very dense and virtually non-resonant. Looking at some recent turntable designs I noted that various forms of carbon fibre reinforced polymers (CFRP) are being used due to their high mechanical strength vs weight and apparently good resonance properties. I spoke with a manufacturer of CFRP materials and selected two variations to try: straight carbon fibre panels (I bought 2 types: 3 mm thick and 1 mm thick; although the latter is to make some leaf springs with) and carbon fibre foam board; a layer of PU foam between two sheets of 1 mm thick CFRP. When they arrived the two things that were immediately apparent were their very high strength and their high degree of resonance! I did not expect them to be so resonant, especially the foam core panels. After some research I decided that a remedy was to use some anti-resonance (called anti-drumming in some applications) material and the most suitable appeared to be Jantzen Bitumen FLEX Panel (2 mm thick) as used in loudspeaker enclosures, and so I bought some from The HiFi Collective. The first shelf to modify was the one supporting the DAC. This was not strictly necessary as the DAC stands on a Townshend Seismic Isolation Platform, but I wanted to create an extension at the rear of the rack for the modified EtherREGEN to sit on. I used the 3 mm thick CFRP cut to shape as shown in the schematic below and applied Jantzen FLEX panel to its underside. It does not slide on the existing shelf and does not need additional fixing as it is held in place firmly by the platform and DAC. The appearance can be seen in the two photographs (the EtherREGEN is also sitting on 2 BR Big Pads). Plan schematic of rack and new shelf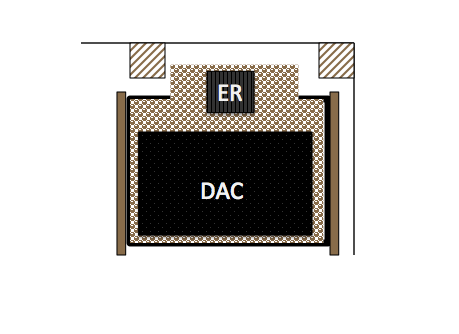 Shelf in place from front Shelf in place from front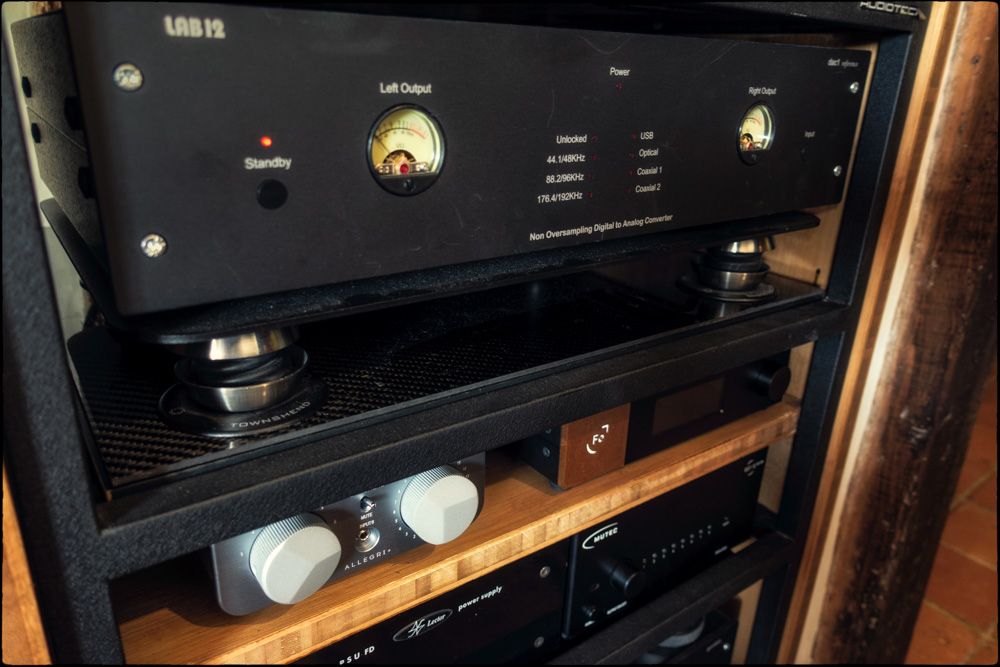 Shelf in place from rear (with modified EtherREGEN) Shelf in place from rear (with modified EtherREGEN)
 |
|
|
|
DIY
Aug 26, 2022 18:31:27 GMT
petea likes this
Post by karatestu on Aug 26, 2022 18:31:27 GMT
Cool, I love little projects like these  . I have looked into carbon fibre previously, as I was designing and building some speakers with spherical enclosures . One manufacturer I researched had done experiments with different materials for their spherical speaker enclosures and the winner was 1mm thick carbon fibre. Apparently the sphere being a stiff shape and the CF's being so rigid enabled them to use the material at only 1mm thickness. I think another strong advantage was it's very low weight which didn't store energy. |
|
|
|
DIY
Aug 26, 2022 21:18:57 GMT
Post by petea on Aug 26, 2022 21:18:57 GMT
And a sphere wouldn't resonate like the sheet material does. However, combined with the damping material it is very dead.
|
|
|
|
DIY
Oct 1, 2022 14:59:49 GMT
Post by MikeMusic on Oct 1, 2022 14:59:49 GMT
|
|
|
|
Post by petea on Oct 1, 2022 17:35:33 GMT
International Break-It Day 14th October then...  |
|
|
|
Post by petea on Oct 9, 2022 18:10:54 GMT
A few years back, I bought a small Proxxon MBS 240/E bandsaw. Now it was not like a needed another bandsaw as I already had a Inca saw I bought decades ago and which is used for wood and it is still going strong and a horizontal metal-cutting bandsaw for cutting larger stock. For very fine work I use a Hegner scroll and so there was no real justification. I first spotted the saw for sale in a local branch of Axminster Tools when I'd popped in to pick up some supplies. It was on their 'sale' table and was reduced by £100 (they were, and still are, usually about £350). However, the table was wobbly and so I walked away as that made it pretty much useless. A few weeks later I went in for something else and it was still on the table and one of the staff has just crossed out the price and added "£105 to clear" and so I had another look and asked about it. He said that it had been set up for a demonstration by the Proxxon rep. and he wasn't even sure it had been used; I cannot see how it could have been. They didn't have the box, but it was all there. and so temptation raised its head and I thought for that price is was worth seeing if I could sort out the wobbly table and it might be useful, maybe for Ina to use to cut glass with as you can get diamond-coated blades for them and a water cooling unit. Back in the workshop it soon became clear what the problem was. Whoever has assembled it had omitted / lost the washer that goes below the table locking screw! It took about 30 seconds to rectify that and the table was then stable and it worked quite well, and has actually proved quite useful for cutting small metal stock on, but there were elements of its design that are poor and annoying. One of these annoyances is the lack of a guide fence (the mitre slide is the usual, almost accurate, Proxxon sliding affair and good enough for cutting stock). I use a large parallel clamped to the table, but I will make something better at some point and maybe replace the existing table with a steel / iron one. The other, and more significant, annoyance was the lower blade guide which was essentially useless and the blade height adjustment was not the most sophisticated. Having thought about it for a while I decided today to do something about it. I had a spare upper guide block for the blade and I figured that with some modification this could be used below the table as well. However, the first job was the strip the saw down and have a look at the height adjuster and the alignment system. The standard upper guide support arm is a simple piece of steel alloy that runs in a recess in the rear case casting with a steel cover. The vertical alignment of the blade is achieved by angling the upper wheel as is common with most bandsaws although the mechanism is a bit crude and the factory setting was way out. Once adjusted (I will probably make a better wheel carrier and adjuster at some point) the upper blade guard tended to foul the wheel at certain blade heights and so that came off and went in the bin, as did the lower one which really achieved nothing apart from making the blade hard to change. The small 'safety'(?) screws on the wheel spindles cause the bearing to bind slightly and so I left them off as it is impossible for the wheel to come off in use as the force of cutting keeps it in place and they will be held by the front cover should you manage to pull the blade backwards during a cut. The guide blocks are quite nicely made and certainly robust enough for the machine, but the support arm was not a good fit and was very crudely made. I therefore machined a new one and designed it so that it supported the block further forward, making the guide block more stable. The end result is shown below. New Support Arm with Guide Block Attached.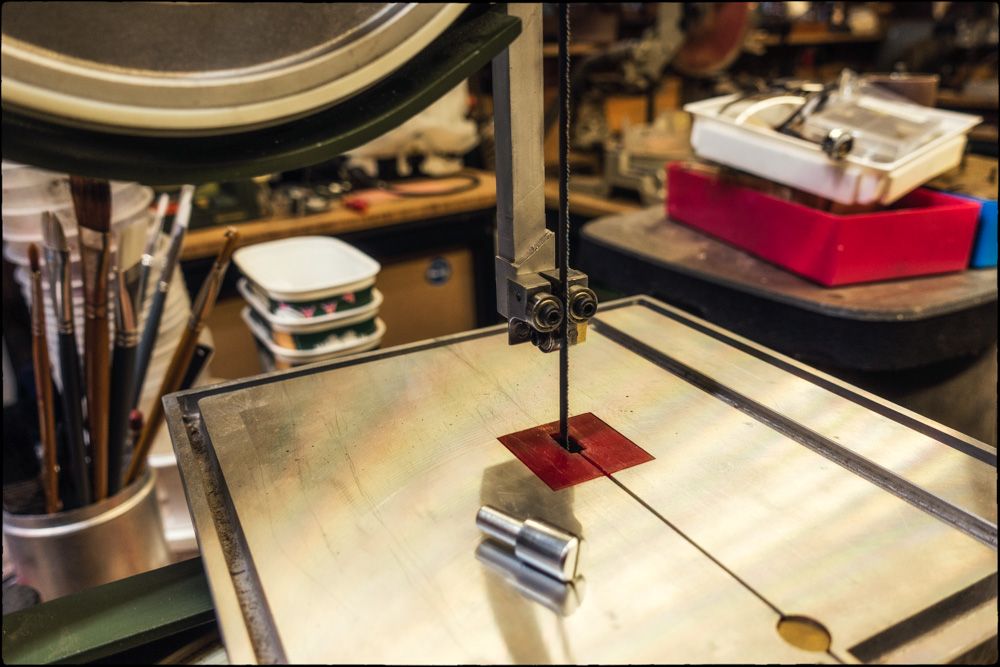 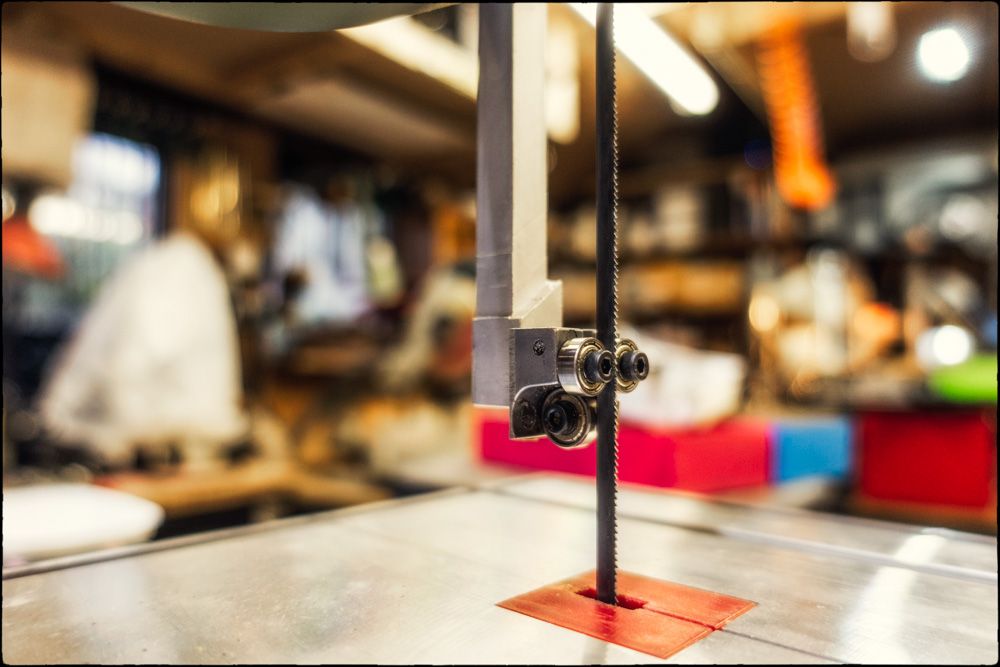 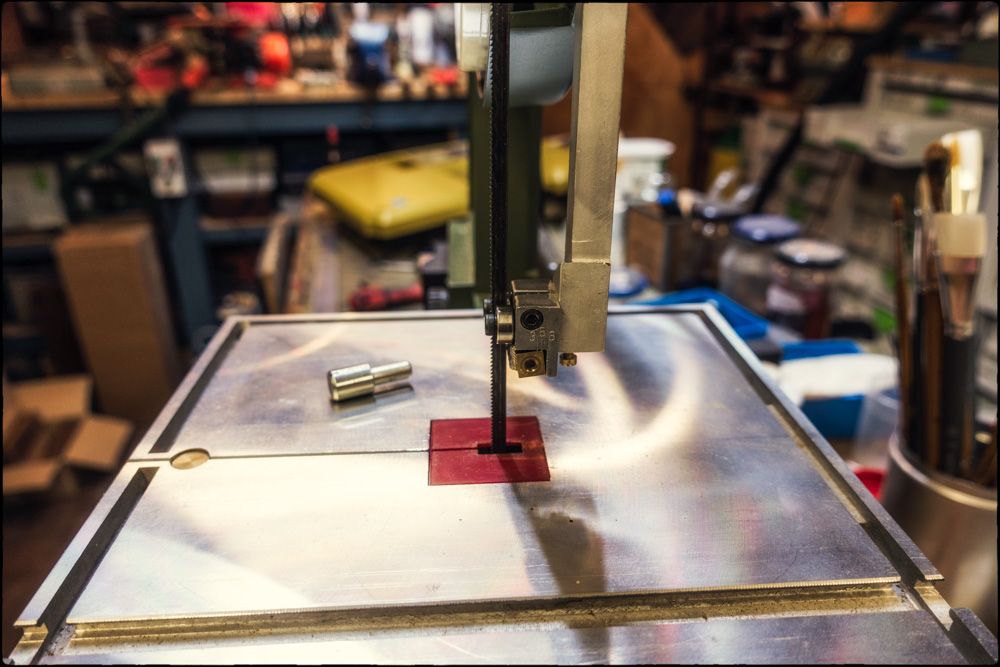 Sitting on the table is the original lower guide. This sits in a hole in the lower case casting and the blade is supposed to run in the slot. It is such a poor fit that it provides virtually no support or guidance for the blade. I therefore machined a round brass peg that fits tightly in the hole in the casting and removed the brass post from the spare guide block. I then machined the exposed portion of the peg such that it was an interference fit in the guide block and held the block in the correct position to support the blade (see below). This works very well and the blade is now supported both above and below the table and cannot wander during a cut. New Lower Guide Block.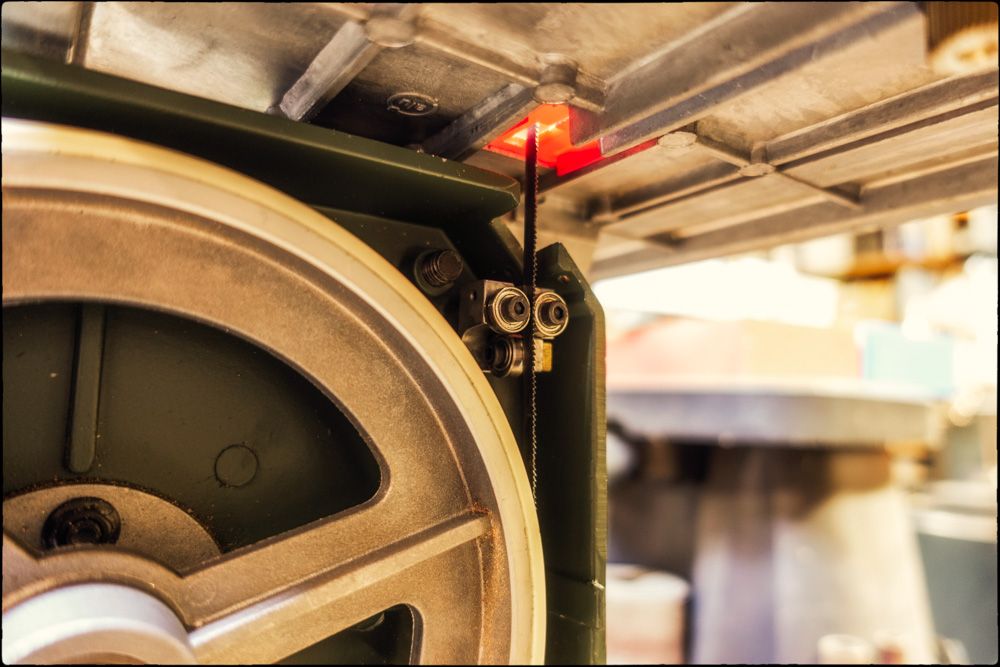 The only modification I will make is to remove the brass post from the upper guide block and replace it with a longer one which I will thread to give a more robust fixing for the arm than the grub screw used in the original design. The only reason I didn't do it this time (I have made the post) is because I will need to drill an access hole in the existing block to enable me to punch out the existing post: the post in the other block was visible already for some reason and they are fixed in with locking compound. I'll buy a spare block first before doing this just in case! All-in-all a worthwhile project. |
|
|
|
DIY
Feb 13, 2023 16:36:53 GMT
Post by MikeMusic on Feb 13, 2023 16:36:53 GMT
Manhole cover broken
The kind lady at Clark Drain advised me what I needed, an upgrade and to contact a builder's merchant
Rang 5 or 6 locally. That came to nothing for the model I want
Wonder if Ebay have it ?
Yup. Just ordered
|
|
|
|
Post by MartinT on Feb 13, 2023 19:10:42 GMT
eBay are my go-to for everything DIY and car.
|
|
|
|
DIY
Feb 13, 2023 20:00:46 GMT
Post by MikeMusic on Feb 13, 2023 20:00:46 GMT
I thought eBay first then told myself not to be daft and go to a physical builder's merchant
'Course Builder's Merchants are also on eBay these days
|
|
|
|
Post by speedysteve on Mar 17, 2023 16:57:08 GMT
Wife wanted another shelf in her Greenhouse. Instead of paying Greenhouse people an arm and leg for their aluminium one, I made one out of speaker build birch plywood off cuts . First Sikagaard wood preserved, then she painted it sage green mould etc resistant paint. She's just got the supporting struts to paint yet. It's not a damp greenhouse. We have concrete base and I've totally weather proofed it. We sit in it for coffee etc as our orangery. It's amazing how warm it is winter time, as long as the sun is out. Under the rug we have that interlocking foam rubber gym flooring. Really nice and warm under foot.  |
|
Fro
Rank: Quartet
   
Posts: 342
|
Post by Fro on Apr 10, 2023 20:15:38 GMT
Decided to tear out old floor in MBR bathroom and retile. - Tear out old - Screw down mortar board and float floor level. - New 1x2 tile with thinset motar. My back will be sore after this job is completed!  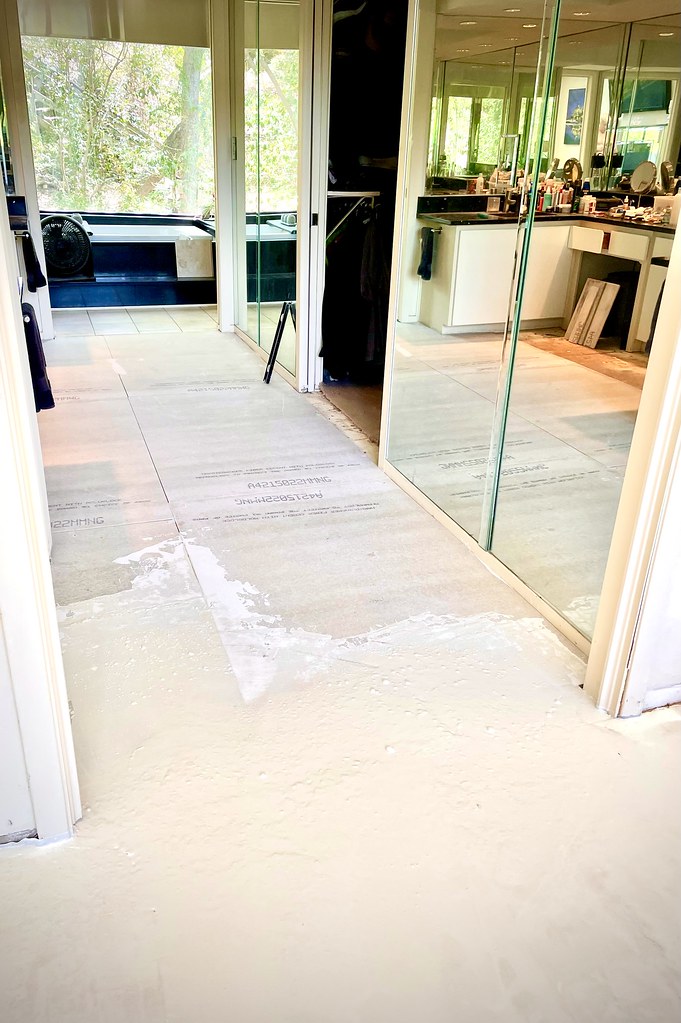  |
|
|
|
DIY
Apr 10, 2023 20:55:05 GMT
Fro likes this
Post by MartinT on Apr 10, 2023 20:55:05 GMT
Looking good, though.
|
|
|
|
Post by speedysteve on Apr 10, 2023 21:40:53 GMT
Found this test interesting.
I own the De Walt. I do a lot of drilling, screwing etc.
It's so torquey you have to watch your wrists! Brace with hip etc at times.
A diy repair man at our tennis club damaged his wrist with one!
I have 2 x 5Ah batteries.
I also have their hedge trimmer & leaf blower that use the same batteries.
I had their strimmer too, but this tool had an epidemic failure that they dodged. Repaired it once and the 2nd time it failed the same way it was out of warranty - no parts, no help - bin/skip it they said.. I now have a 40V Toro that's been great.
The De Walt batteries both refused to charge about 2-3 years ago.
A simple shorting hack on YouTube fixed them both - worked ever since.
Apparently De Walt service say bin/recycle 😠
I've had them about 5 years now!
They show no sign of dieing in use, or length of operation.
Anyway, the video - she sure is persistent!
|
|
|
|
Post by petea on May 13, 2023 15:50:31 GMT
Today I finished installing / upgrading my airbrush station by building a paint mixing bench next to the spray booth / hood and improving the storage and adding an additional compressor. I also installed the extraction hose for the hood properly by removing one of the double-glazed panels from the window behind and insetting an insulated panel containing two permanent outlets; one for the small air conditioner and one for the spray booth. I thought I better take a picture before it gets covered in paint!  |
|
|
|
DIY
May 13, 2023 17:13:39 GMT
Post by MikeMusic on May 13, 2023 17:13:39 GMT
Pete
Can you please come round my place and sort out our sheds and garage
|
|
|
|
Post by petea on May 13, 2023 17:27:58 GMT
You should see the state own the rest of the studio before asking that, Mike!  Mind, after tomorrow morning it should be in order again. I hope. |
|
|
|
DIY
Jul 31, 2023 14:18:37 GMT
Post by MikeMusic on Jul 31, 2023 14:18:37 GMT
How to read an almost unreadable water meter
Our water meter is just off the road down a hole about 2 feet down
Lying on the road I can just touch it, pull out the earth, leaves and other rubbish, clear the face and see - a semi transparent plastic cover over the meter
Glasses on, LED torch, face above the hole in the ground gives me a guess of the reading.
Phone used as camera, no good
Any bright ideas ?
Last water engineer recommended we stick with the old meter for many reasons
|
|
|
|
DIY
Jul 31, 2023 14:47:48 GMT
Post by MartinT on Jul 31, 2023 14:47:48 GMT
Ours is down a deep hole. Just turned on the phone LED, zoomed a bit and took a photo pointing down the hole. Worked perfectly.
|
|
|
|
DIY
Jul 31, 2023 15:27:12 GMT
Post by MikeMusic on Jul 31, 2023 15:27:12 GMT
Think the plastic cover is too frosted but I will practise
Our water bill is almost twice normal, with an estimated reading.
Affinity have history in over estimating
|
|