

How to assemble a HiFiBerry metal case for Pi & Digi+
Jun 4, 2016 16:36:47 GMT
Tim and speedysteve like this
Post by ChrisB on Jun 4, 2016 16:36:47 GMT
HiFiBerry make a really nice metal case for the Raspberry Pi and Digi+ but there are no instructions as to how to assemble it properly, so I thought I'd provide a photo guide for anyone who wants to put their own case together. There is a guide for the Pi / DAC case, which is basically the same thing, but it's not really clear because a couple of the steps could be better explained.
So, first of all, here's a link to the HiFiBerry shop page, where the case can be ordered from: Steel Case for HiFiBerry Digi+, Black
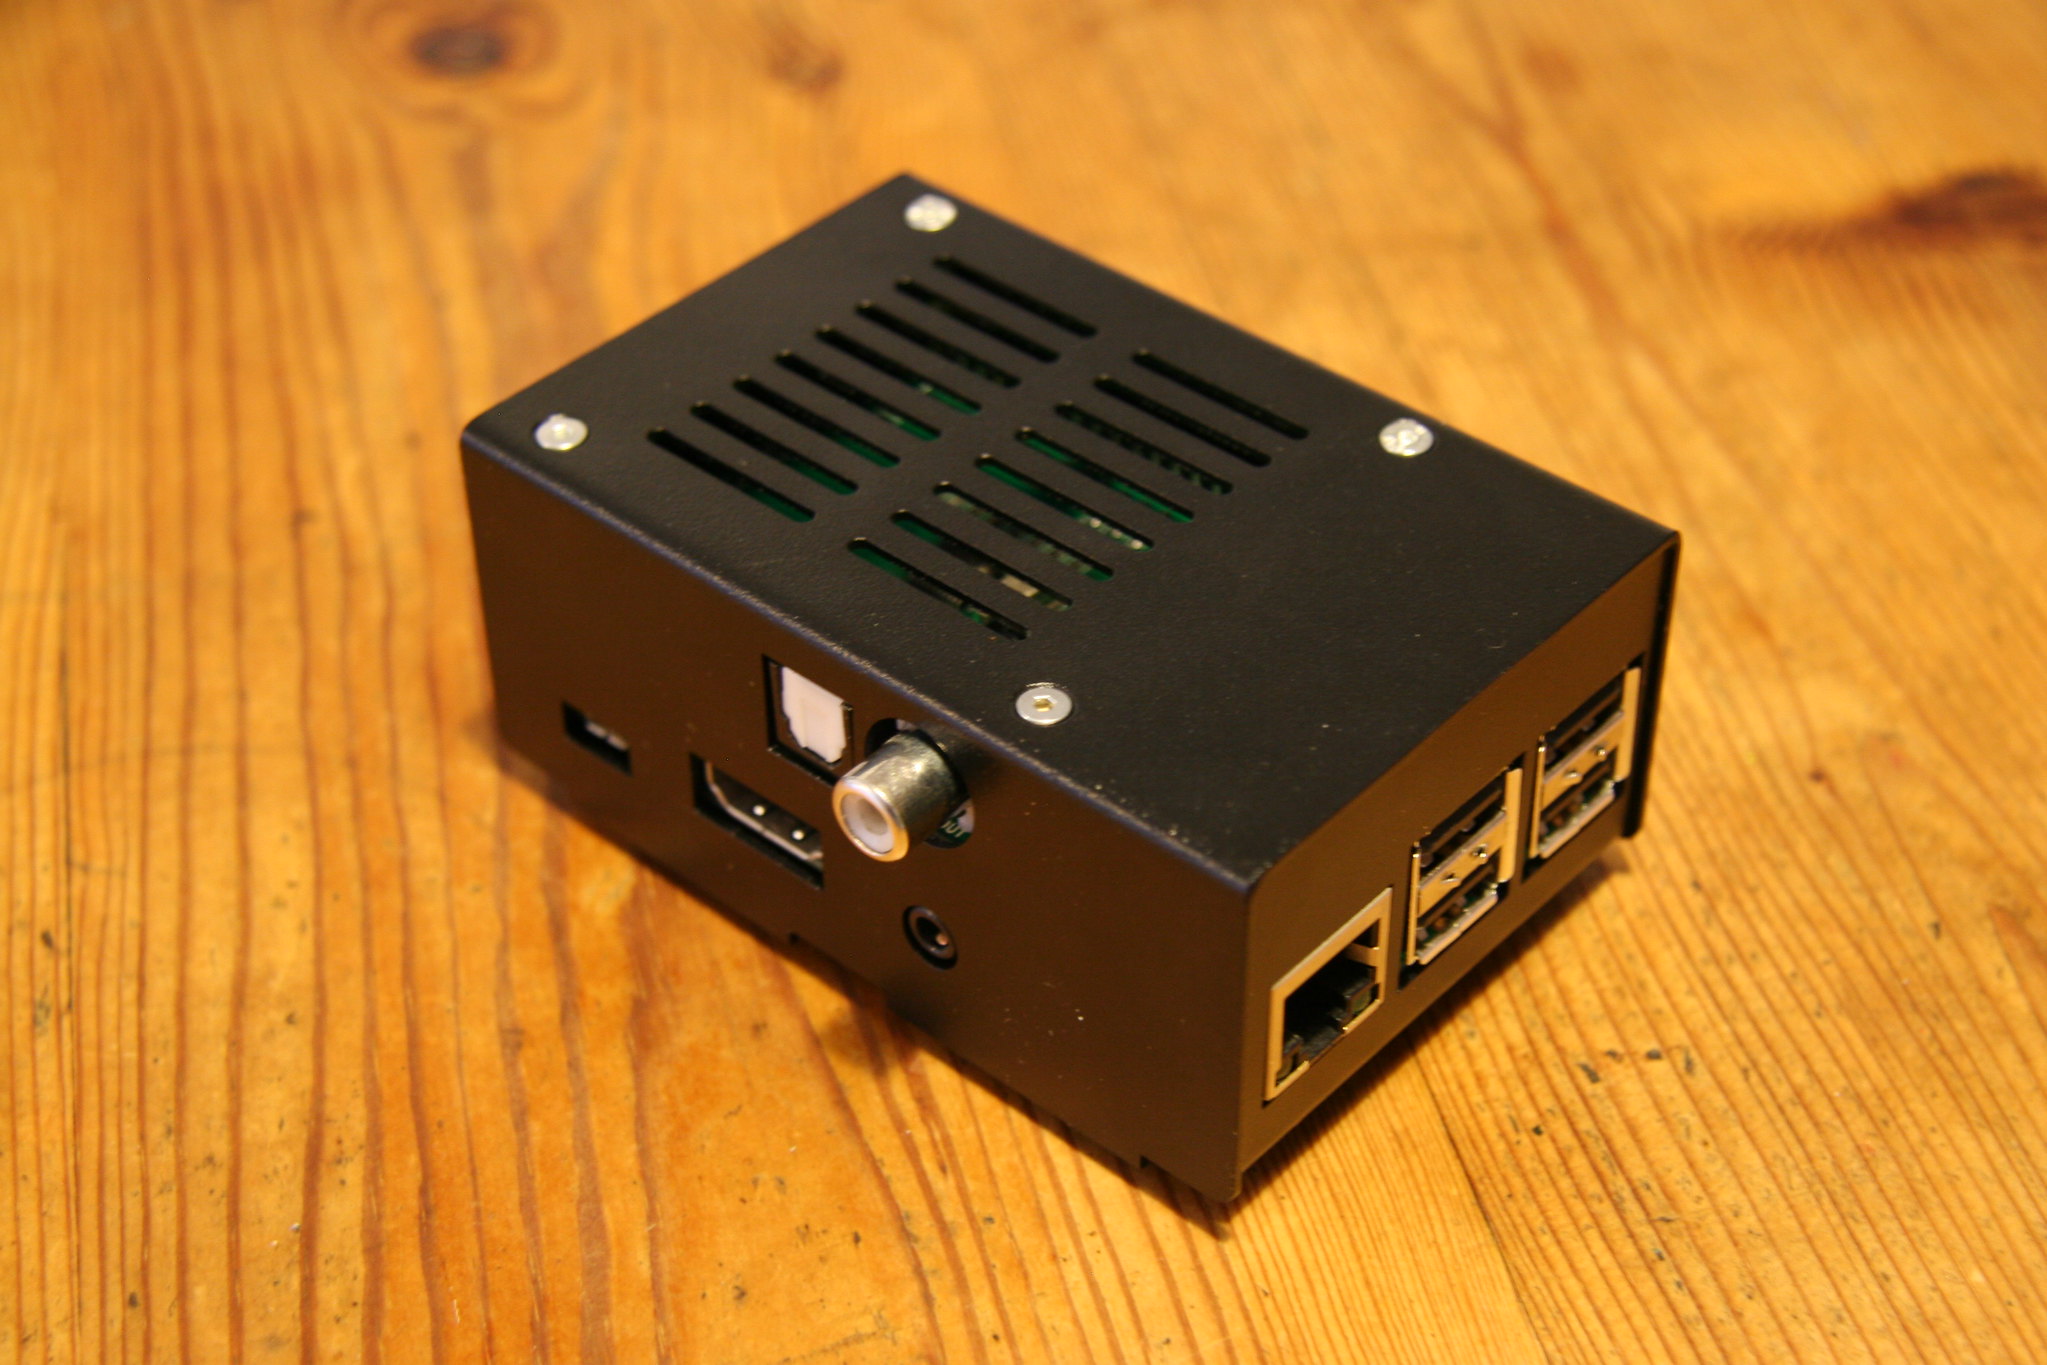
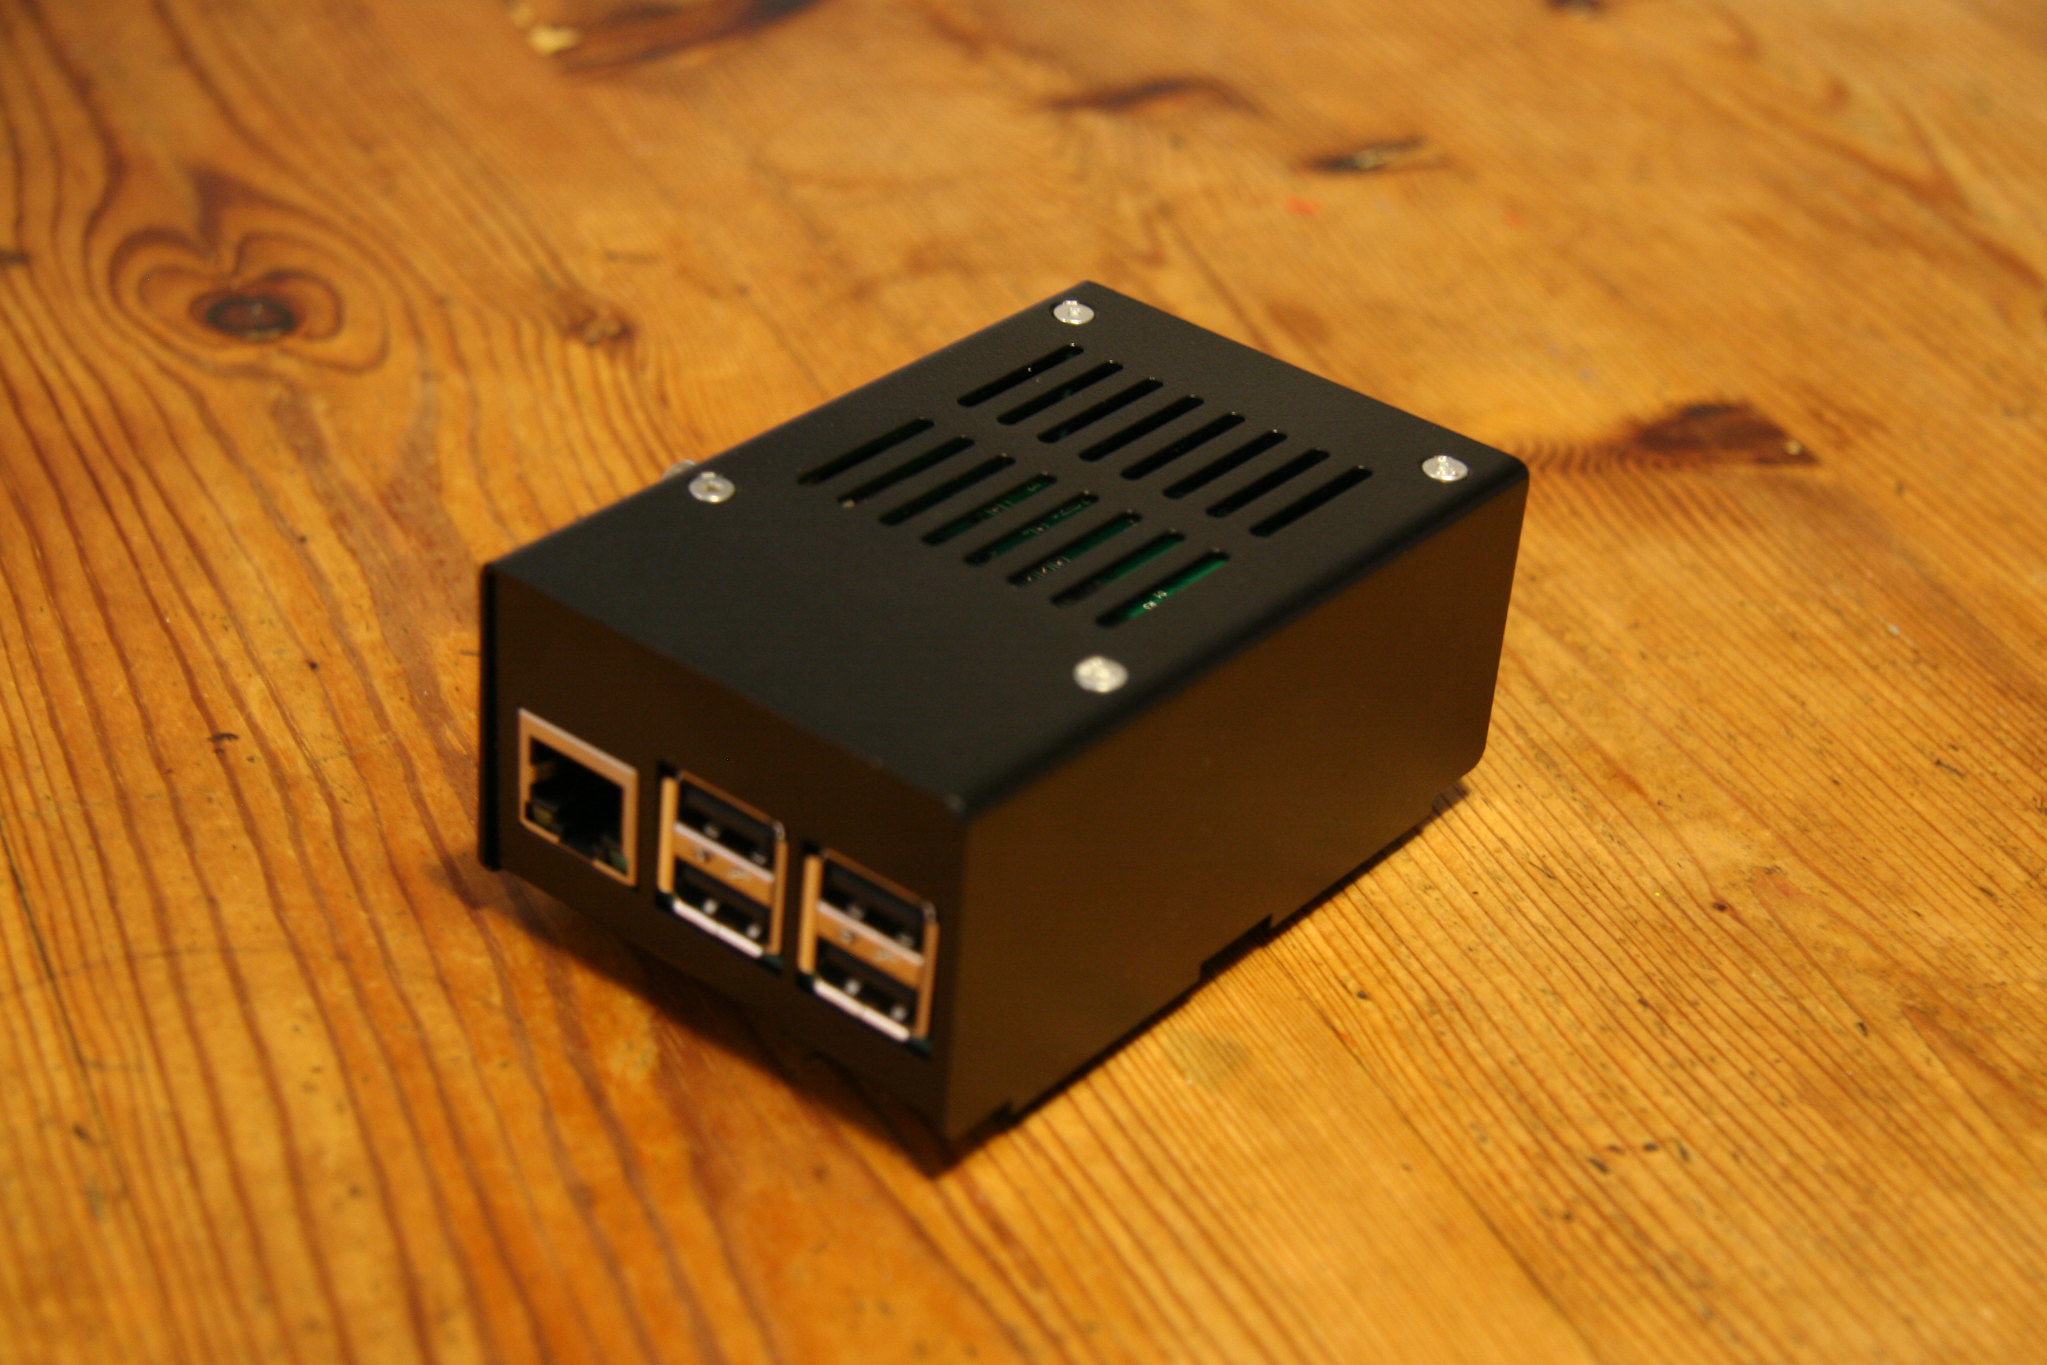
This is what we're hoping to end up with.
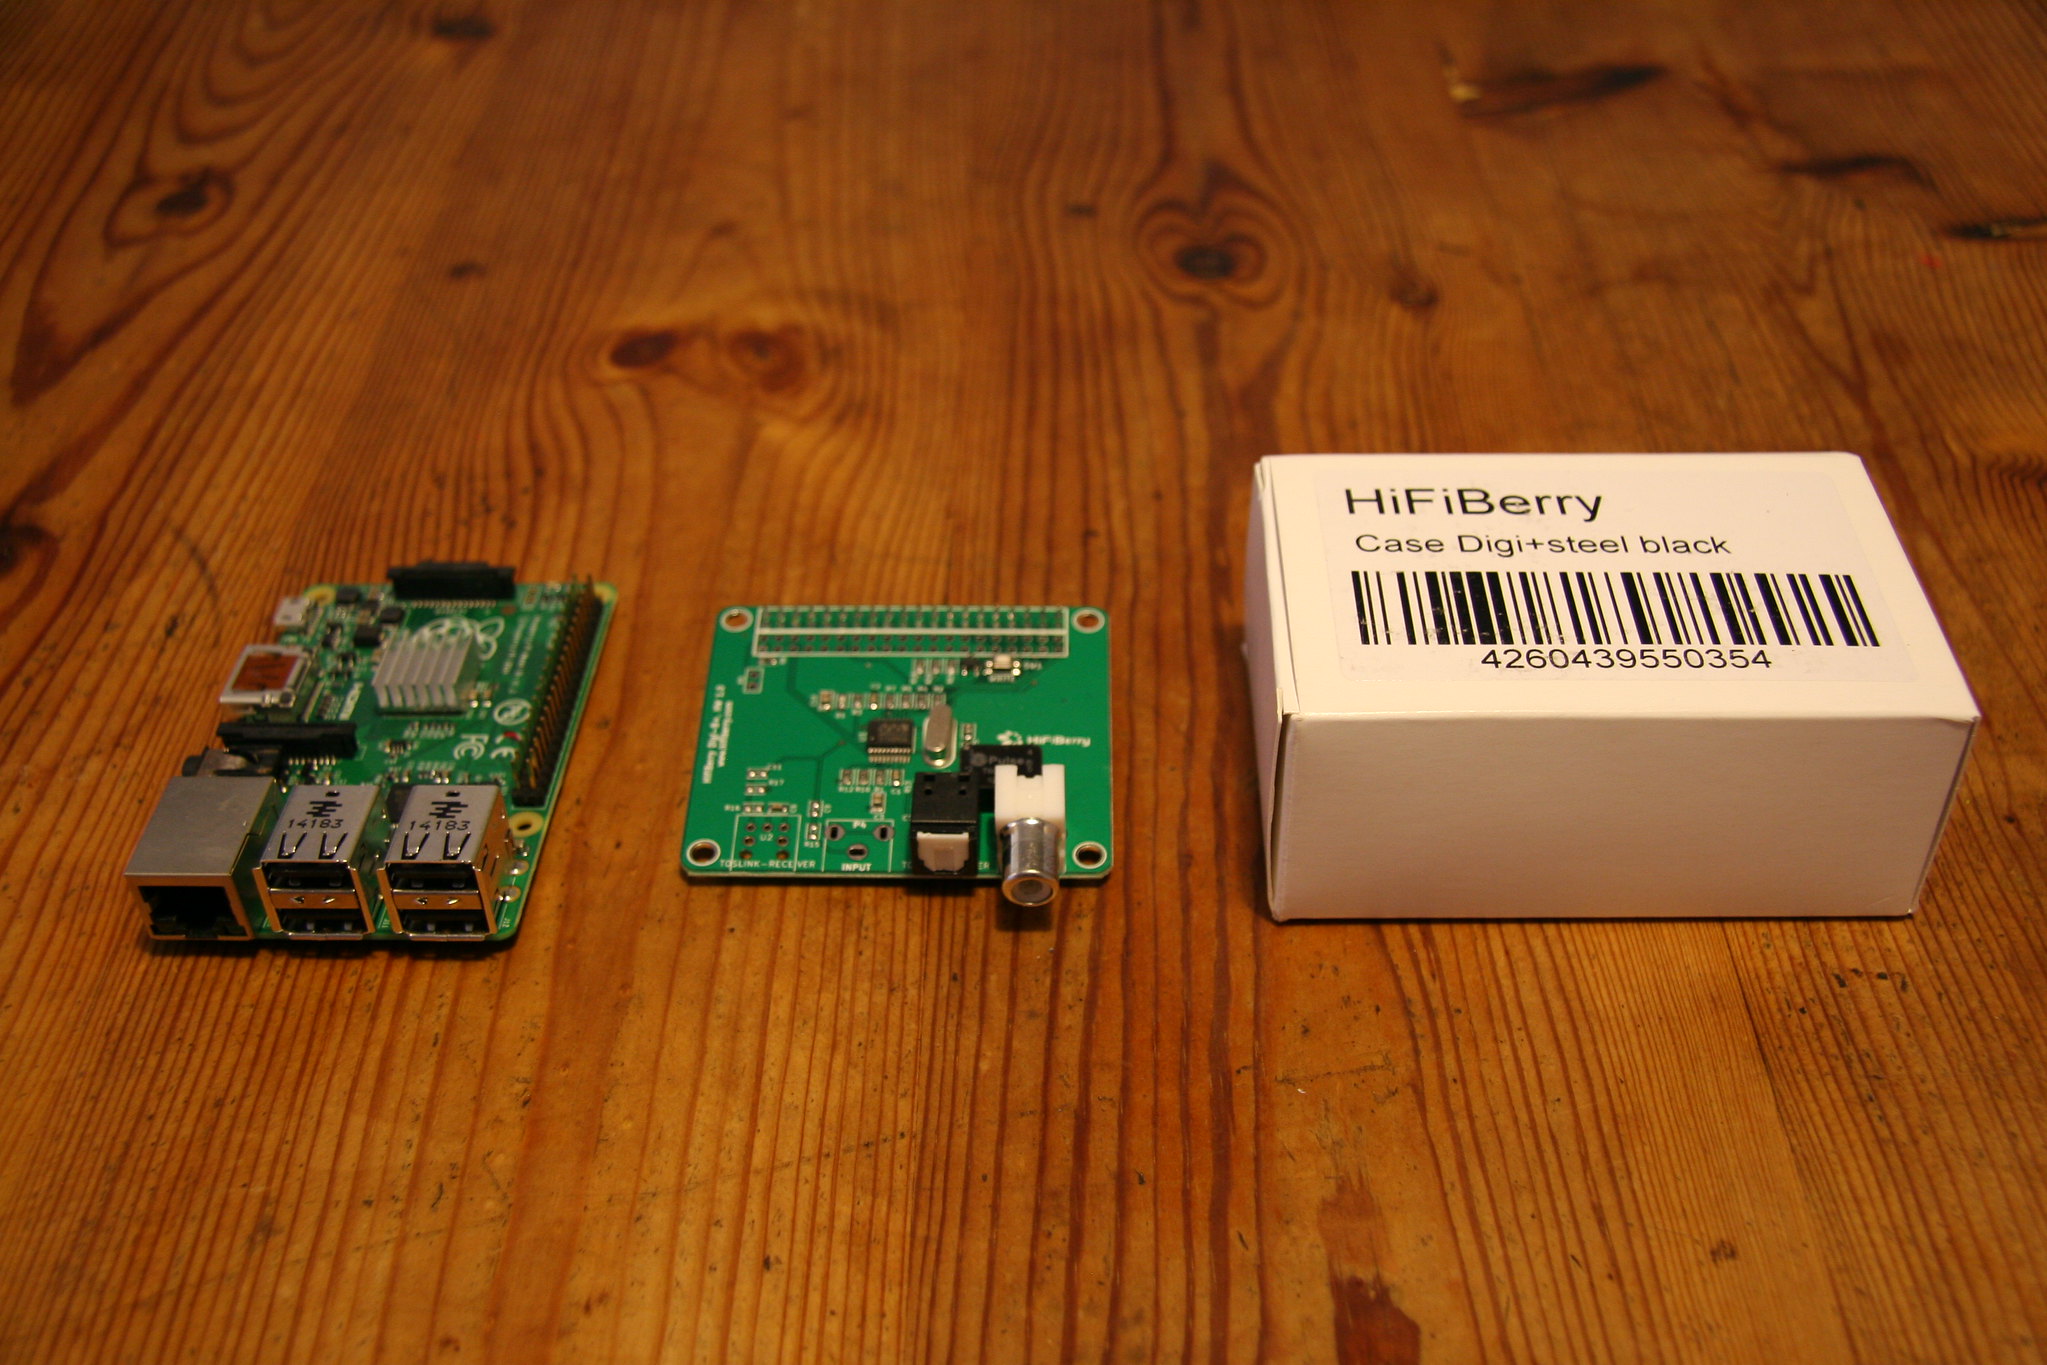
Case as delivered along with the Raspberry Pi and Digi+ boards
Parts
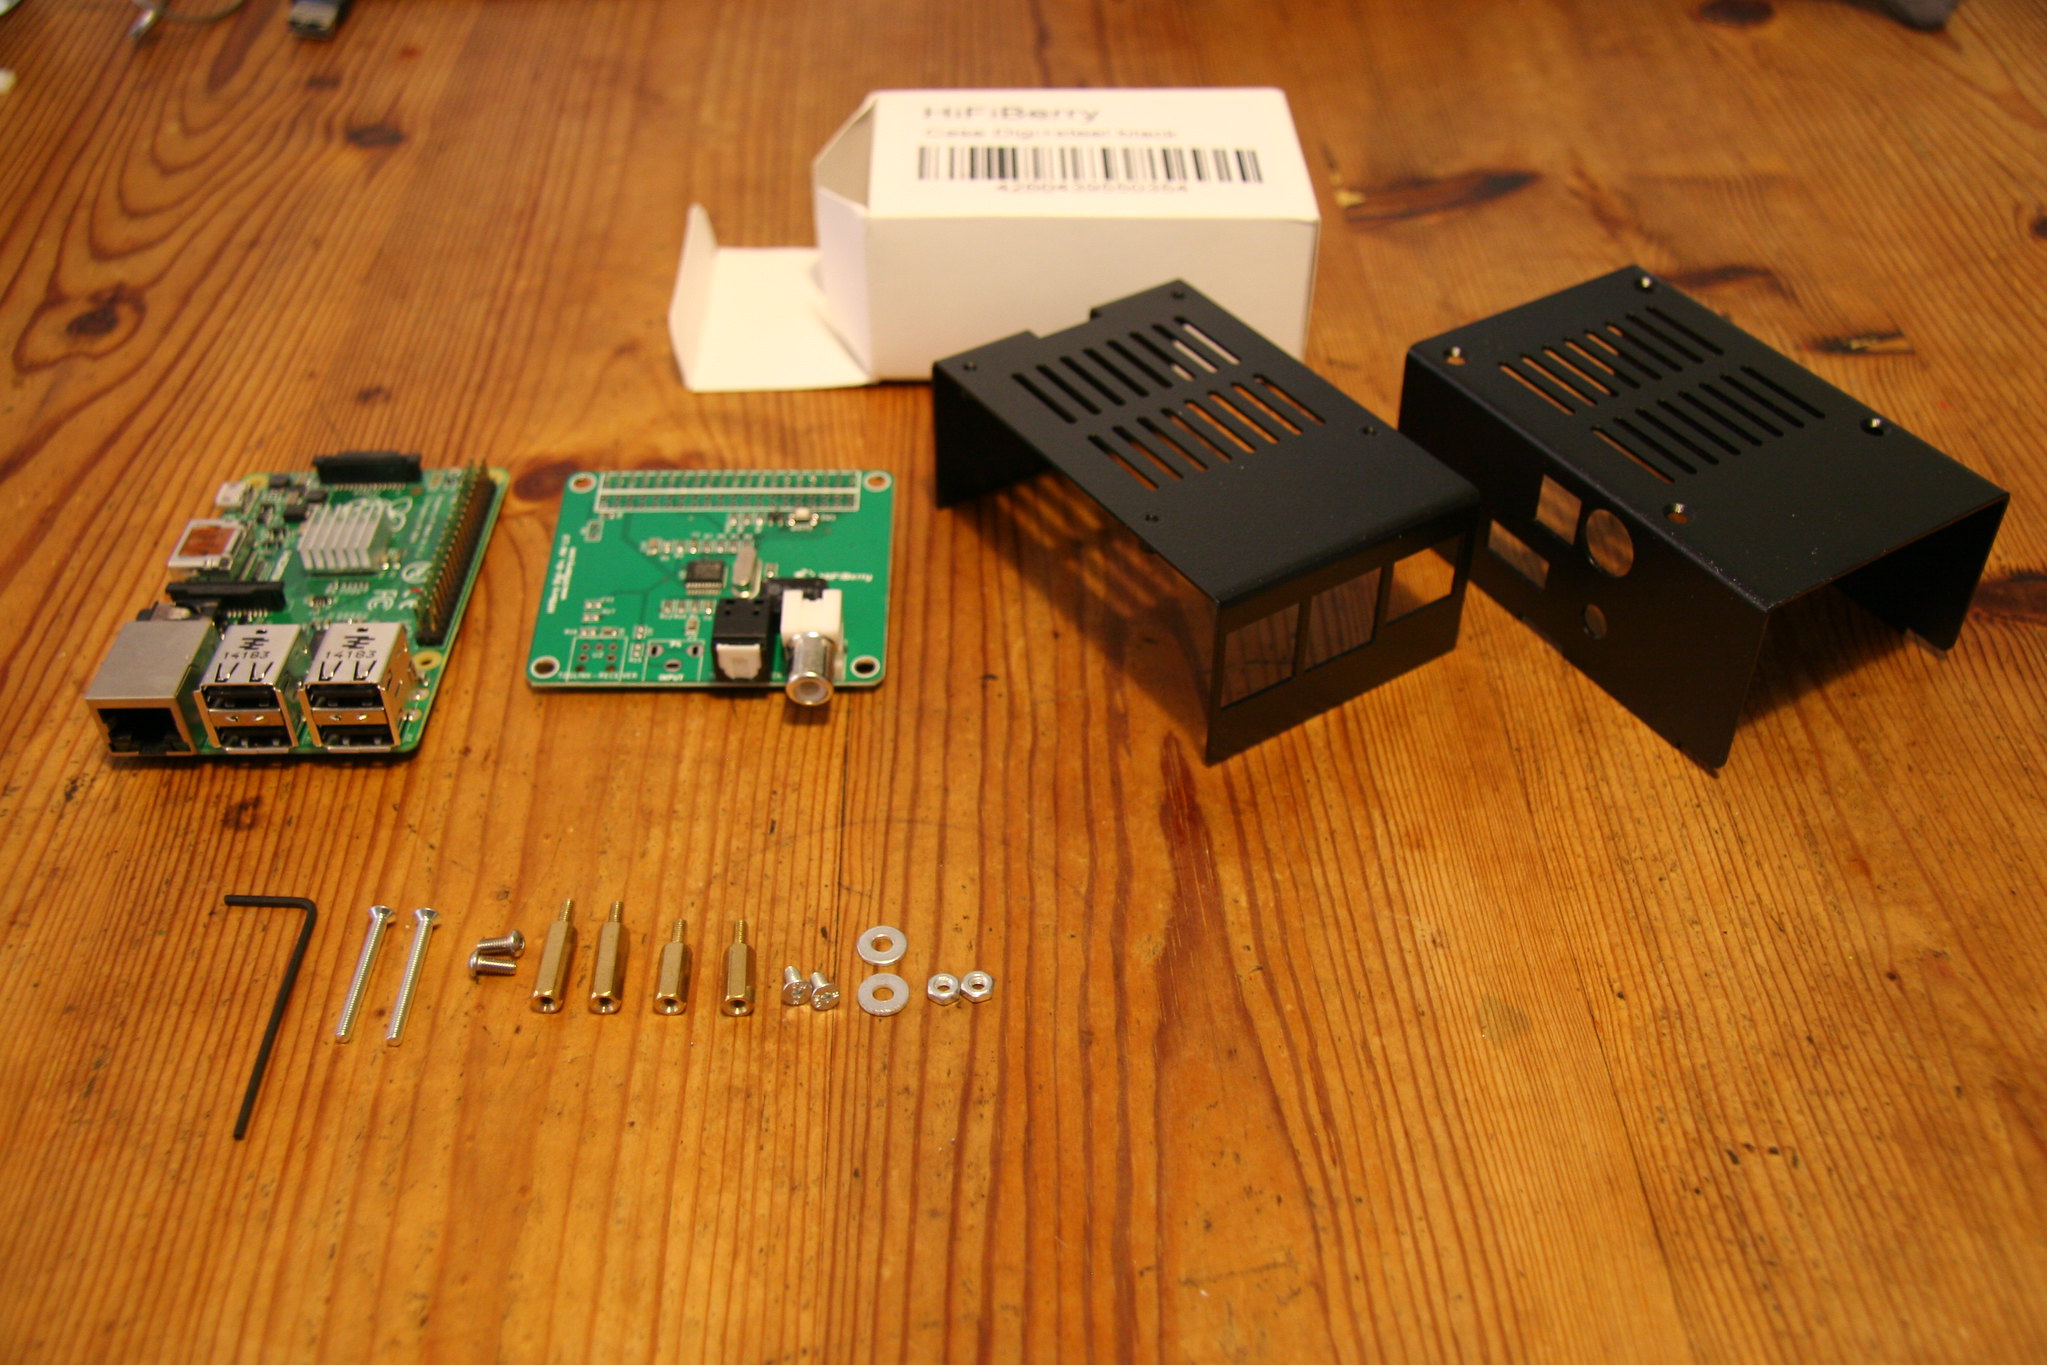
Fastenings
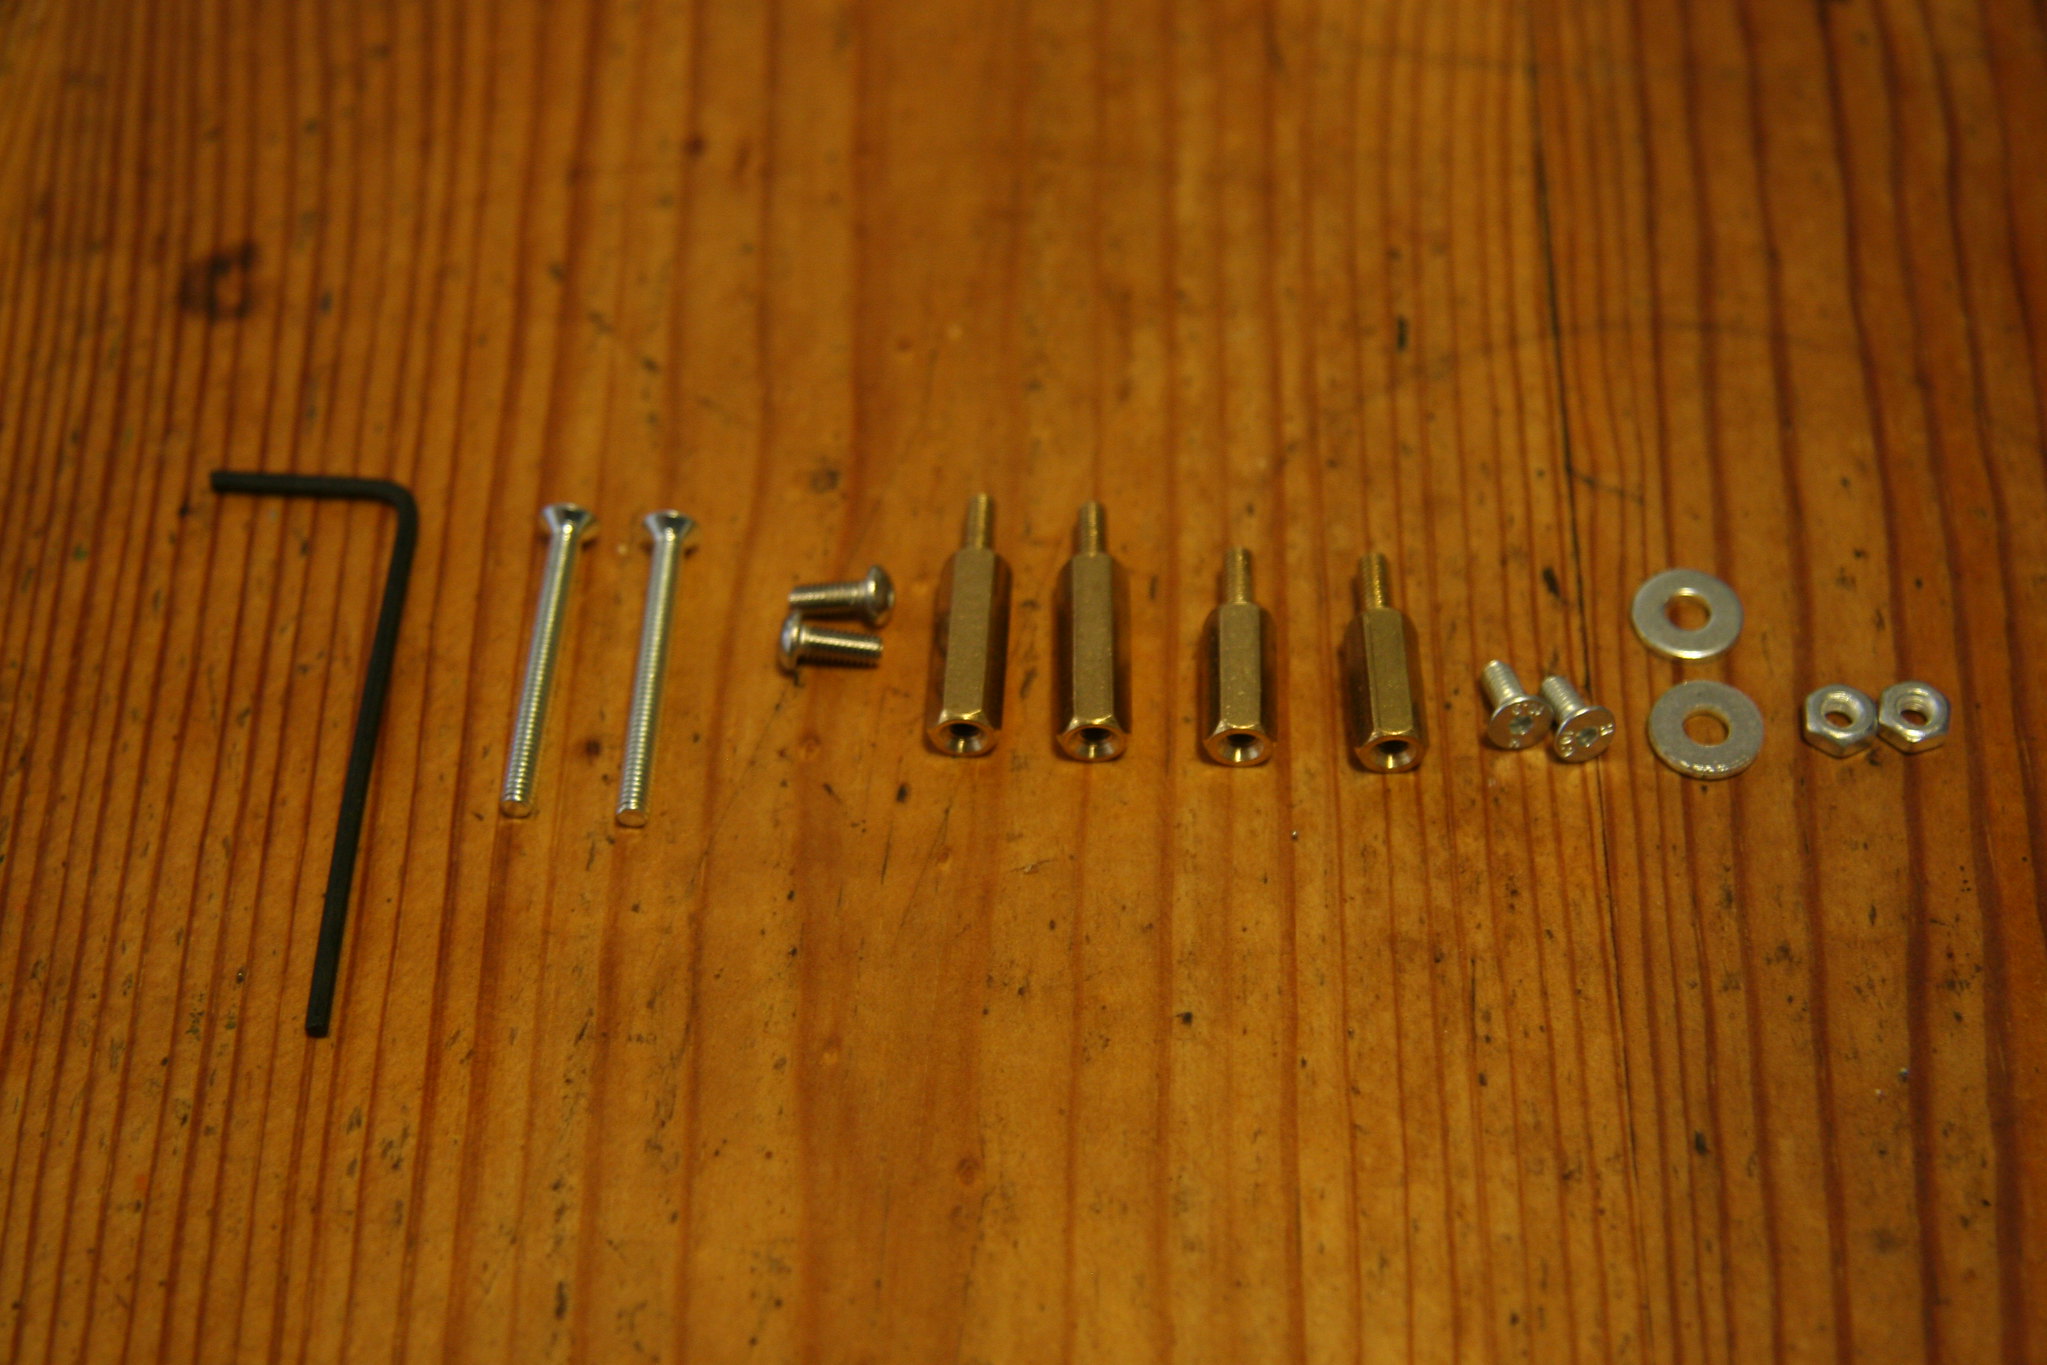
From left to right:
Allen key
2 x countersunk bolts (long)
2 x dome headed bolts
2 x tall spacers
2 x short spacers
2 x countersunk bolts (short)
2 x washers
2 x nuts
Mount the Pi Board
Attach the Rasp Pi to the lower clam-shell half of the case by positioning it so the sockets match up with their respective holes in the case.
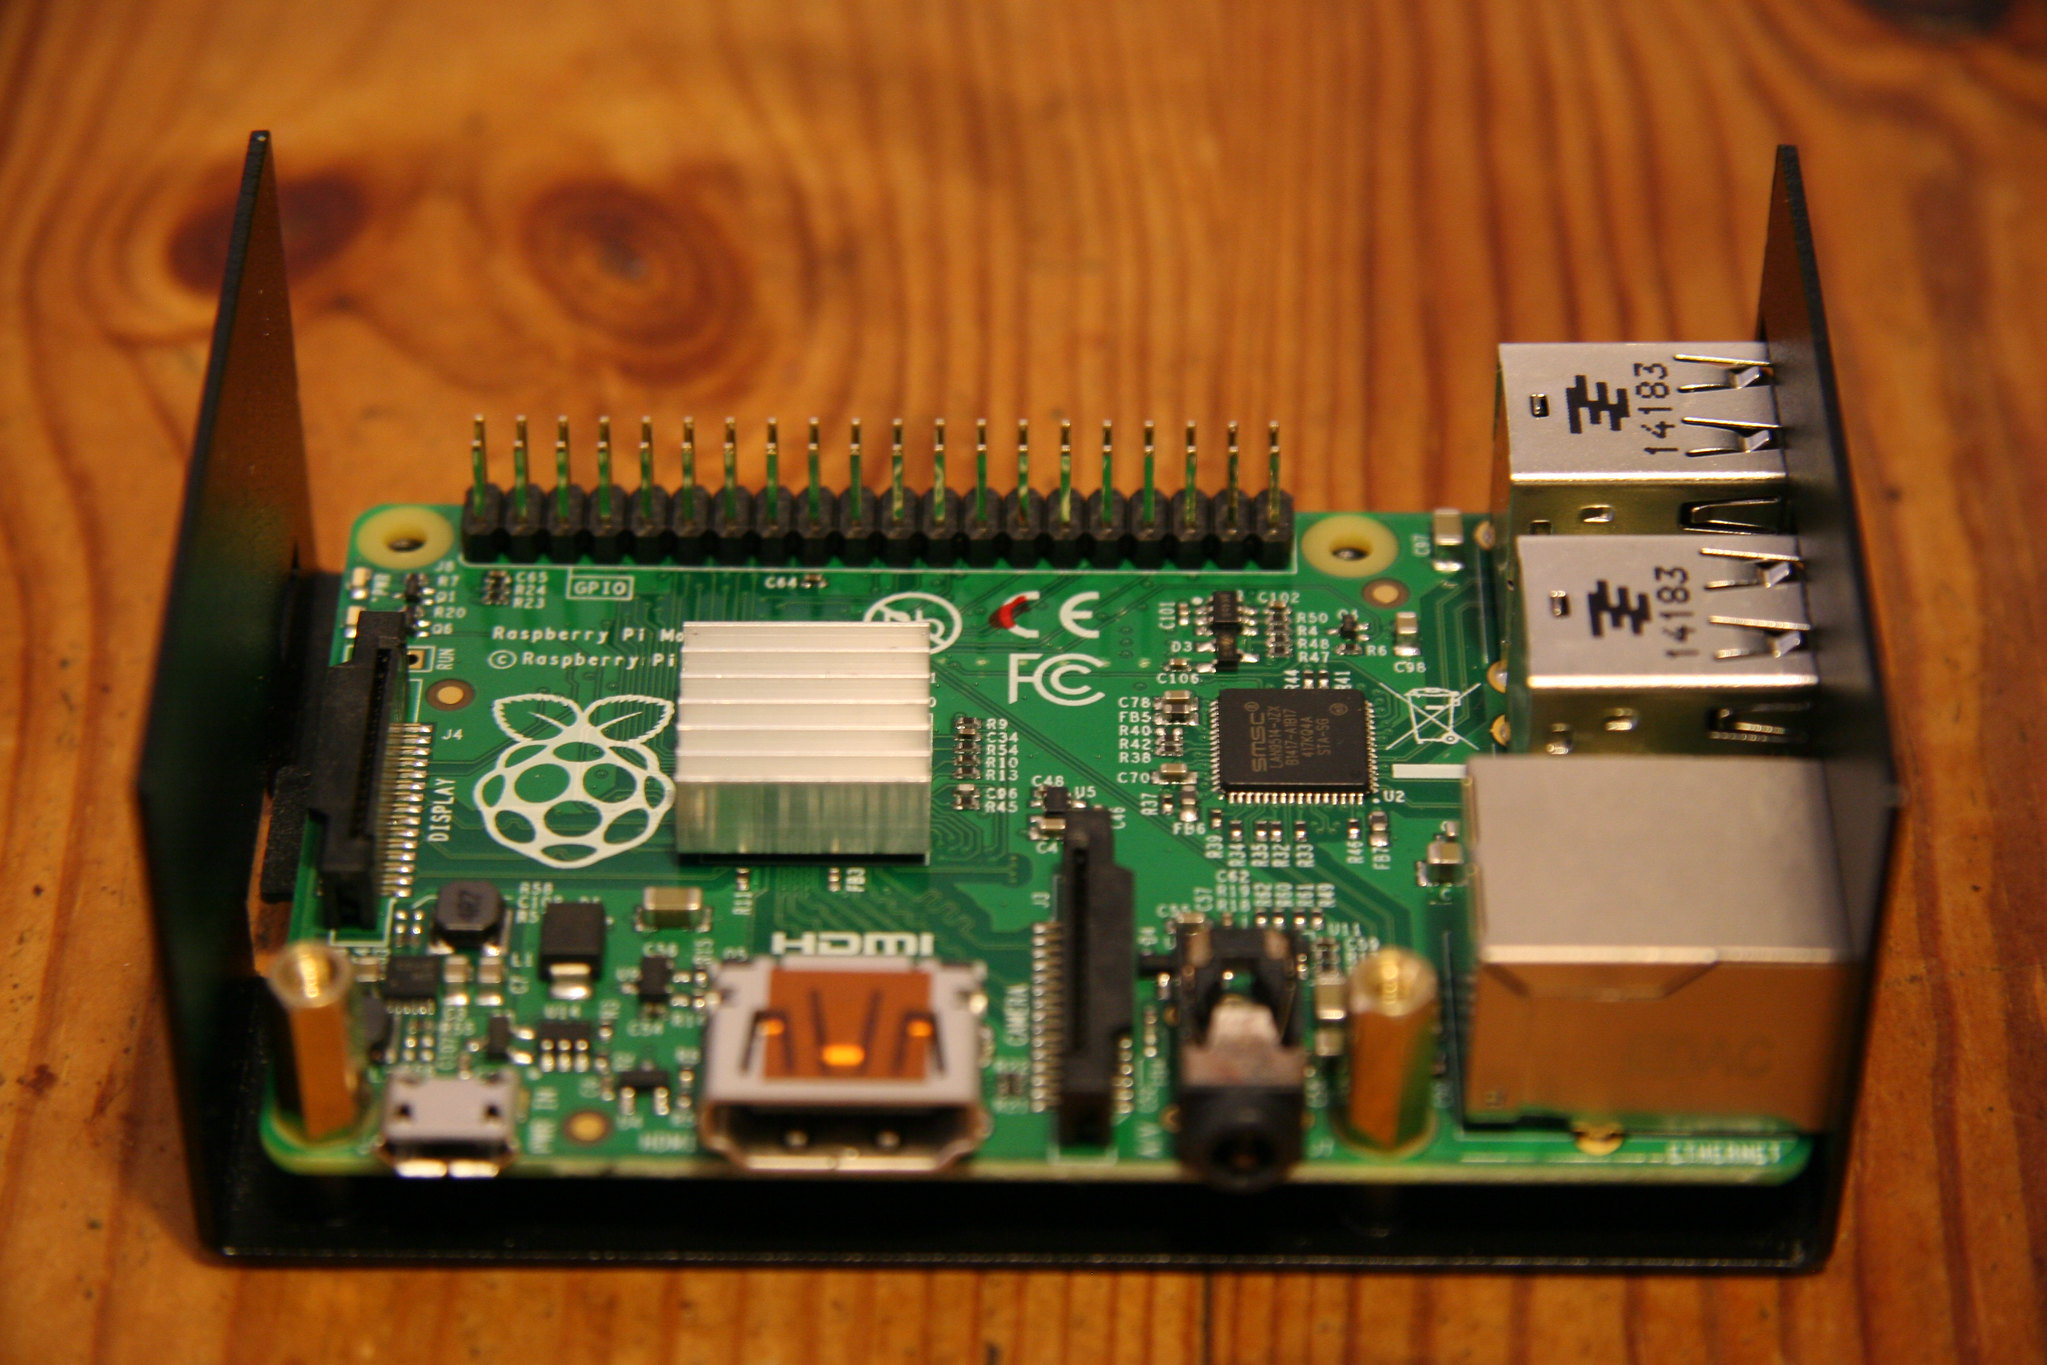
Using the 2 short spacers, you'll find that when you push their threaded ends through the fastening holes in the Pi board they will line up with some threaded lugs in the case. You need to use the fastening holes on the same side of the board as the power supply and headphone sockets are located.
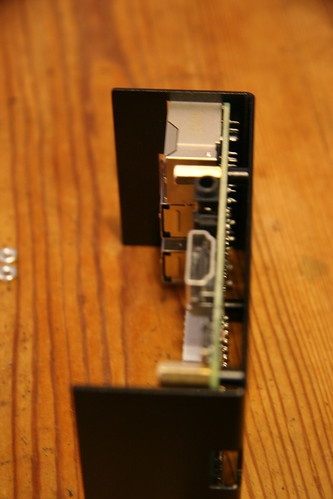
This photo just about shows the lugs between the board and the case bottom.
Prepare the Digi+ Board
Take the long spacers and thread them through the fastening holes in the Digi+ board - use the ones on either end of the big black multi-pin socket - and screw the nuts onto the threaded ends.
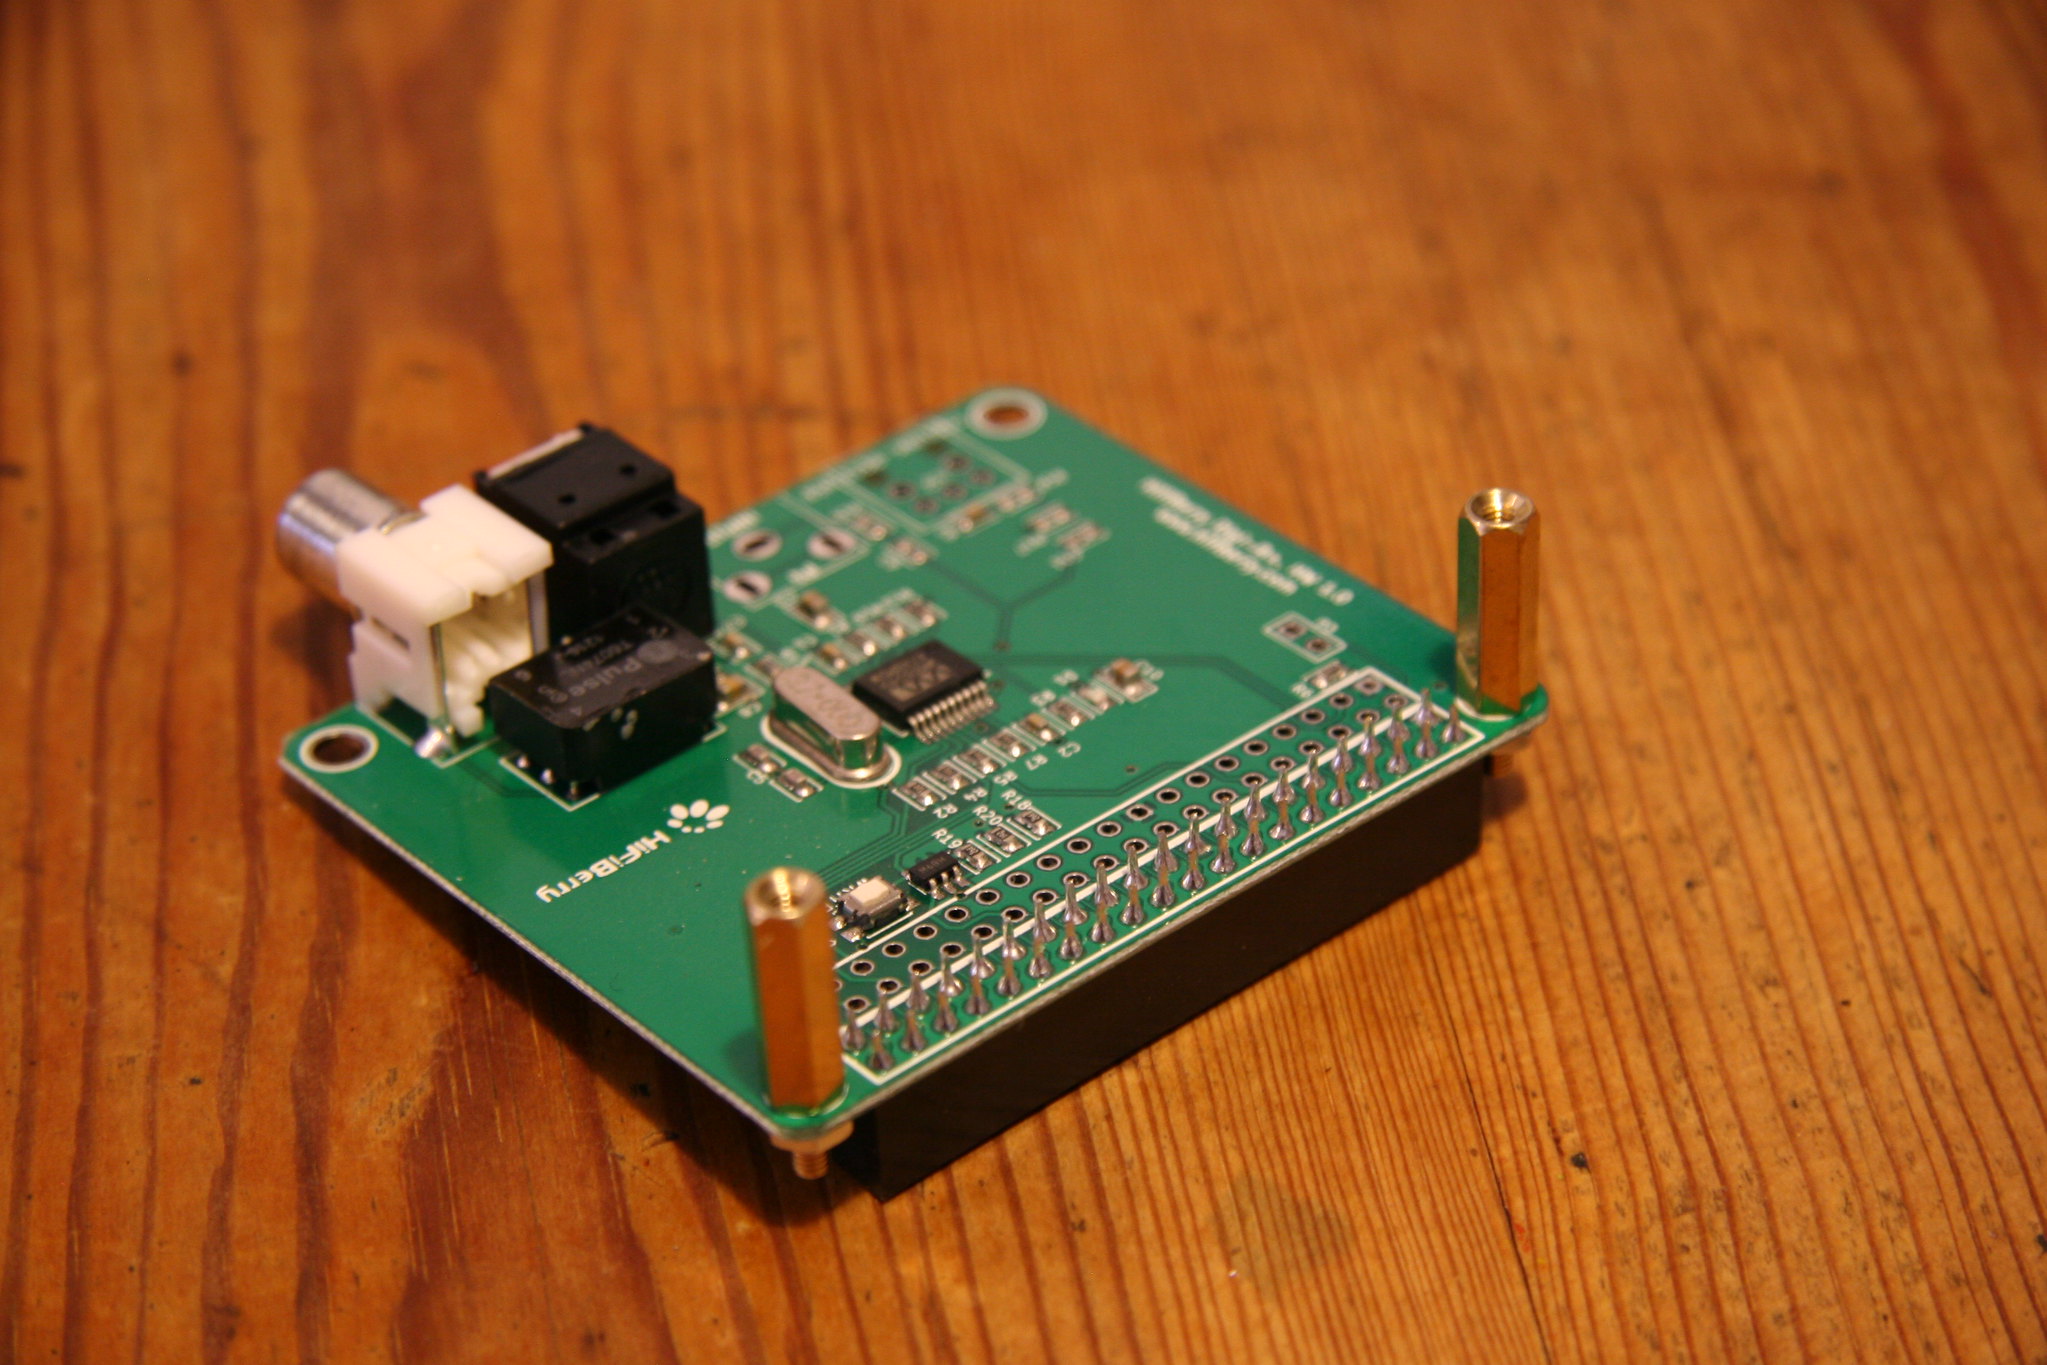
The spacers go on the top of the board and the nuts go underneath.
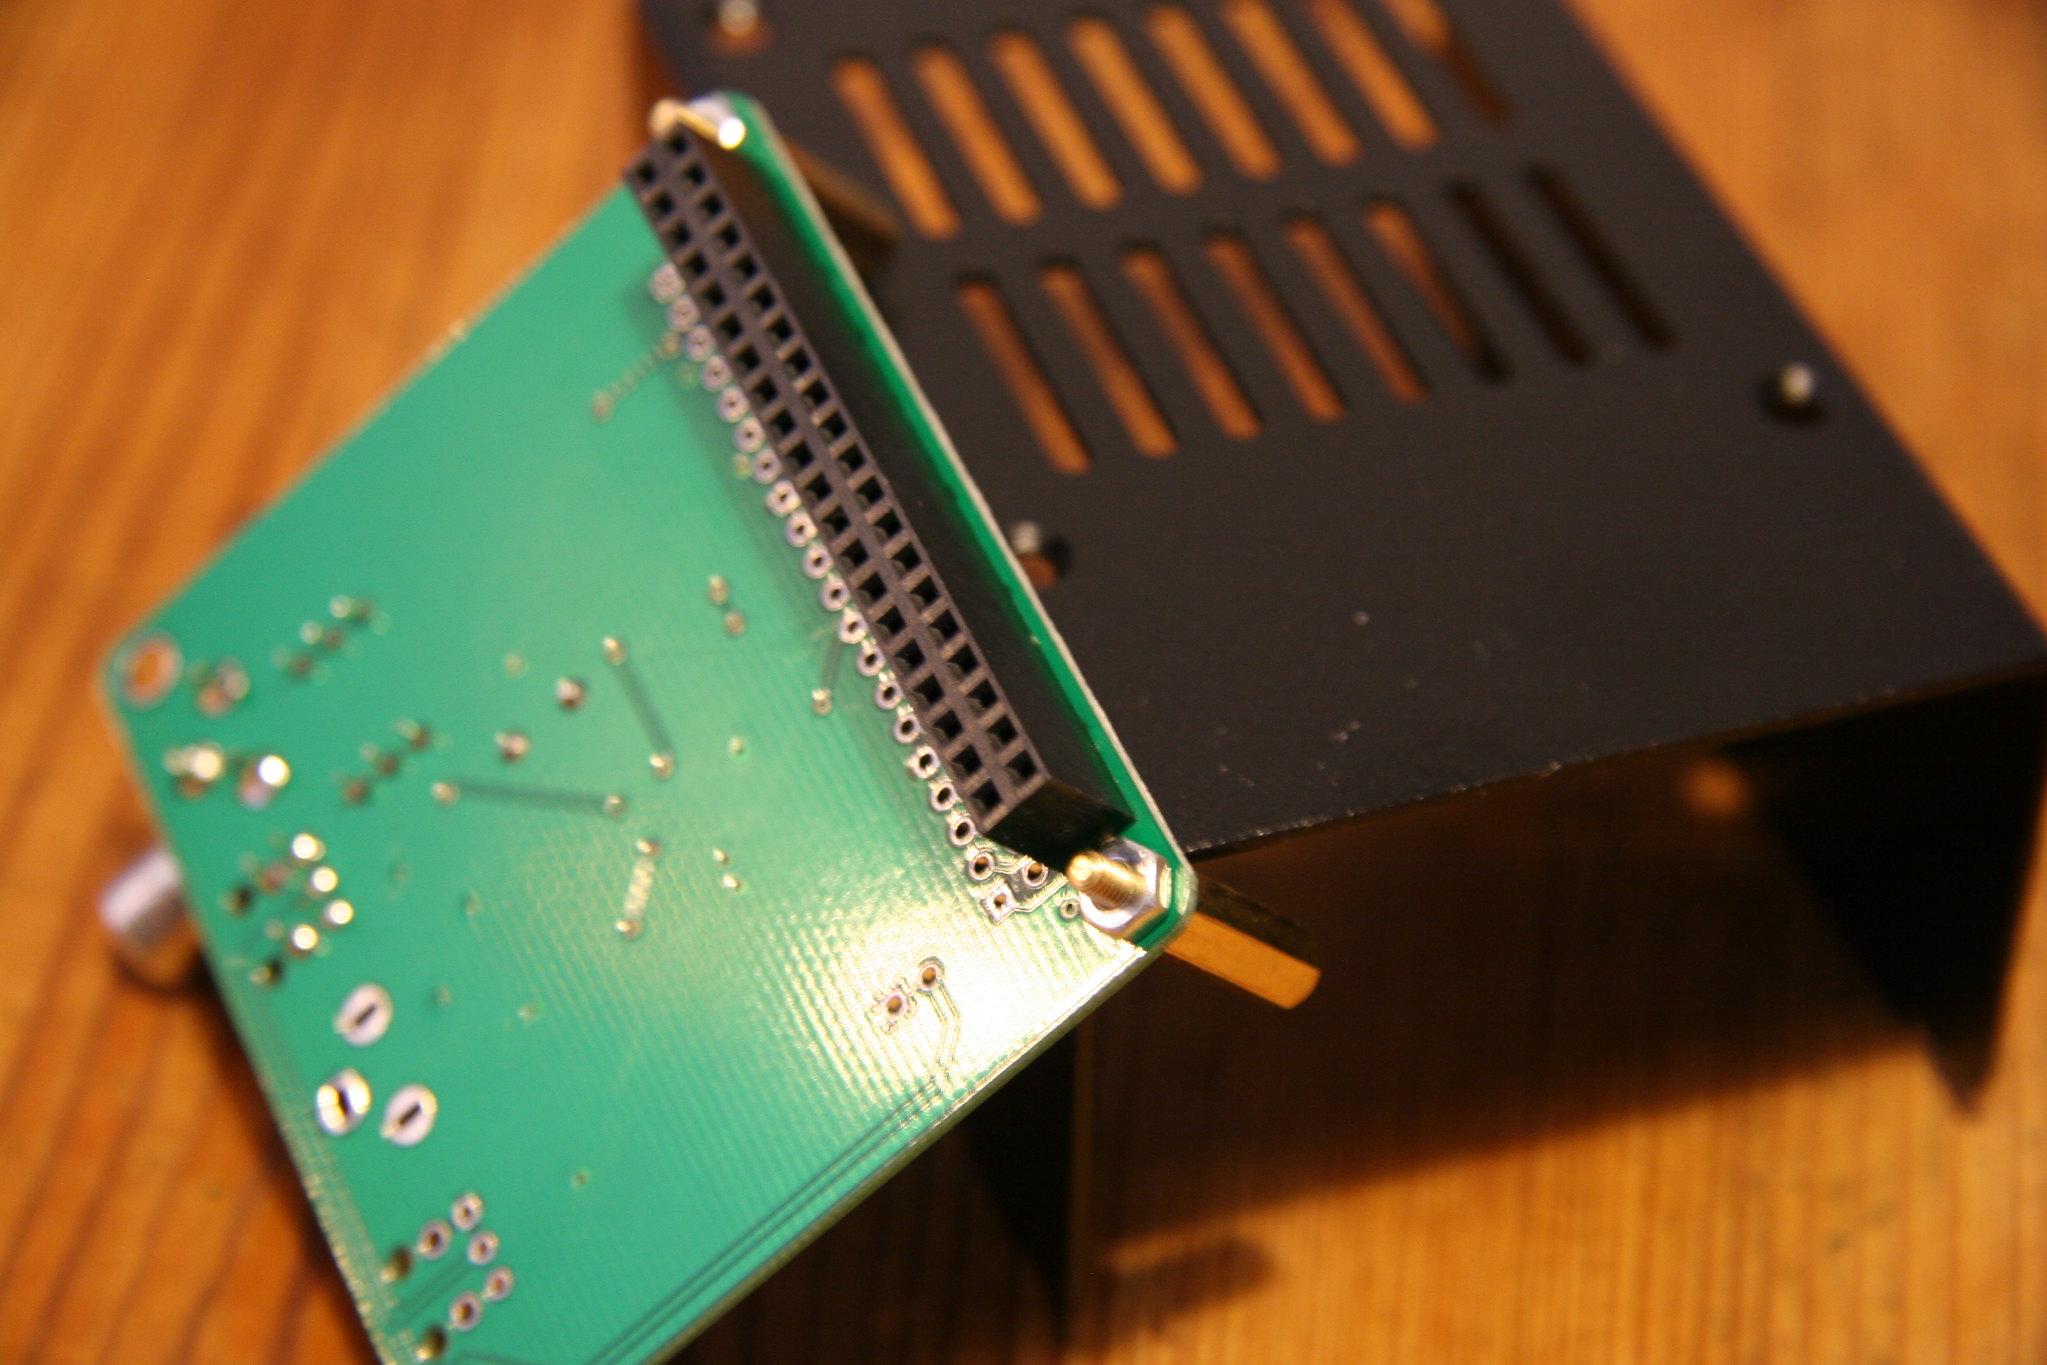
Mount the Digi+ Board
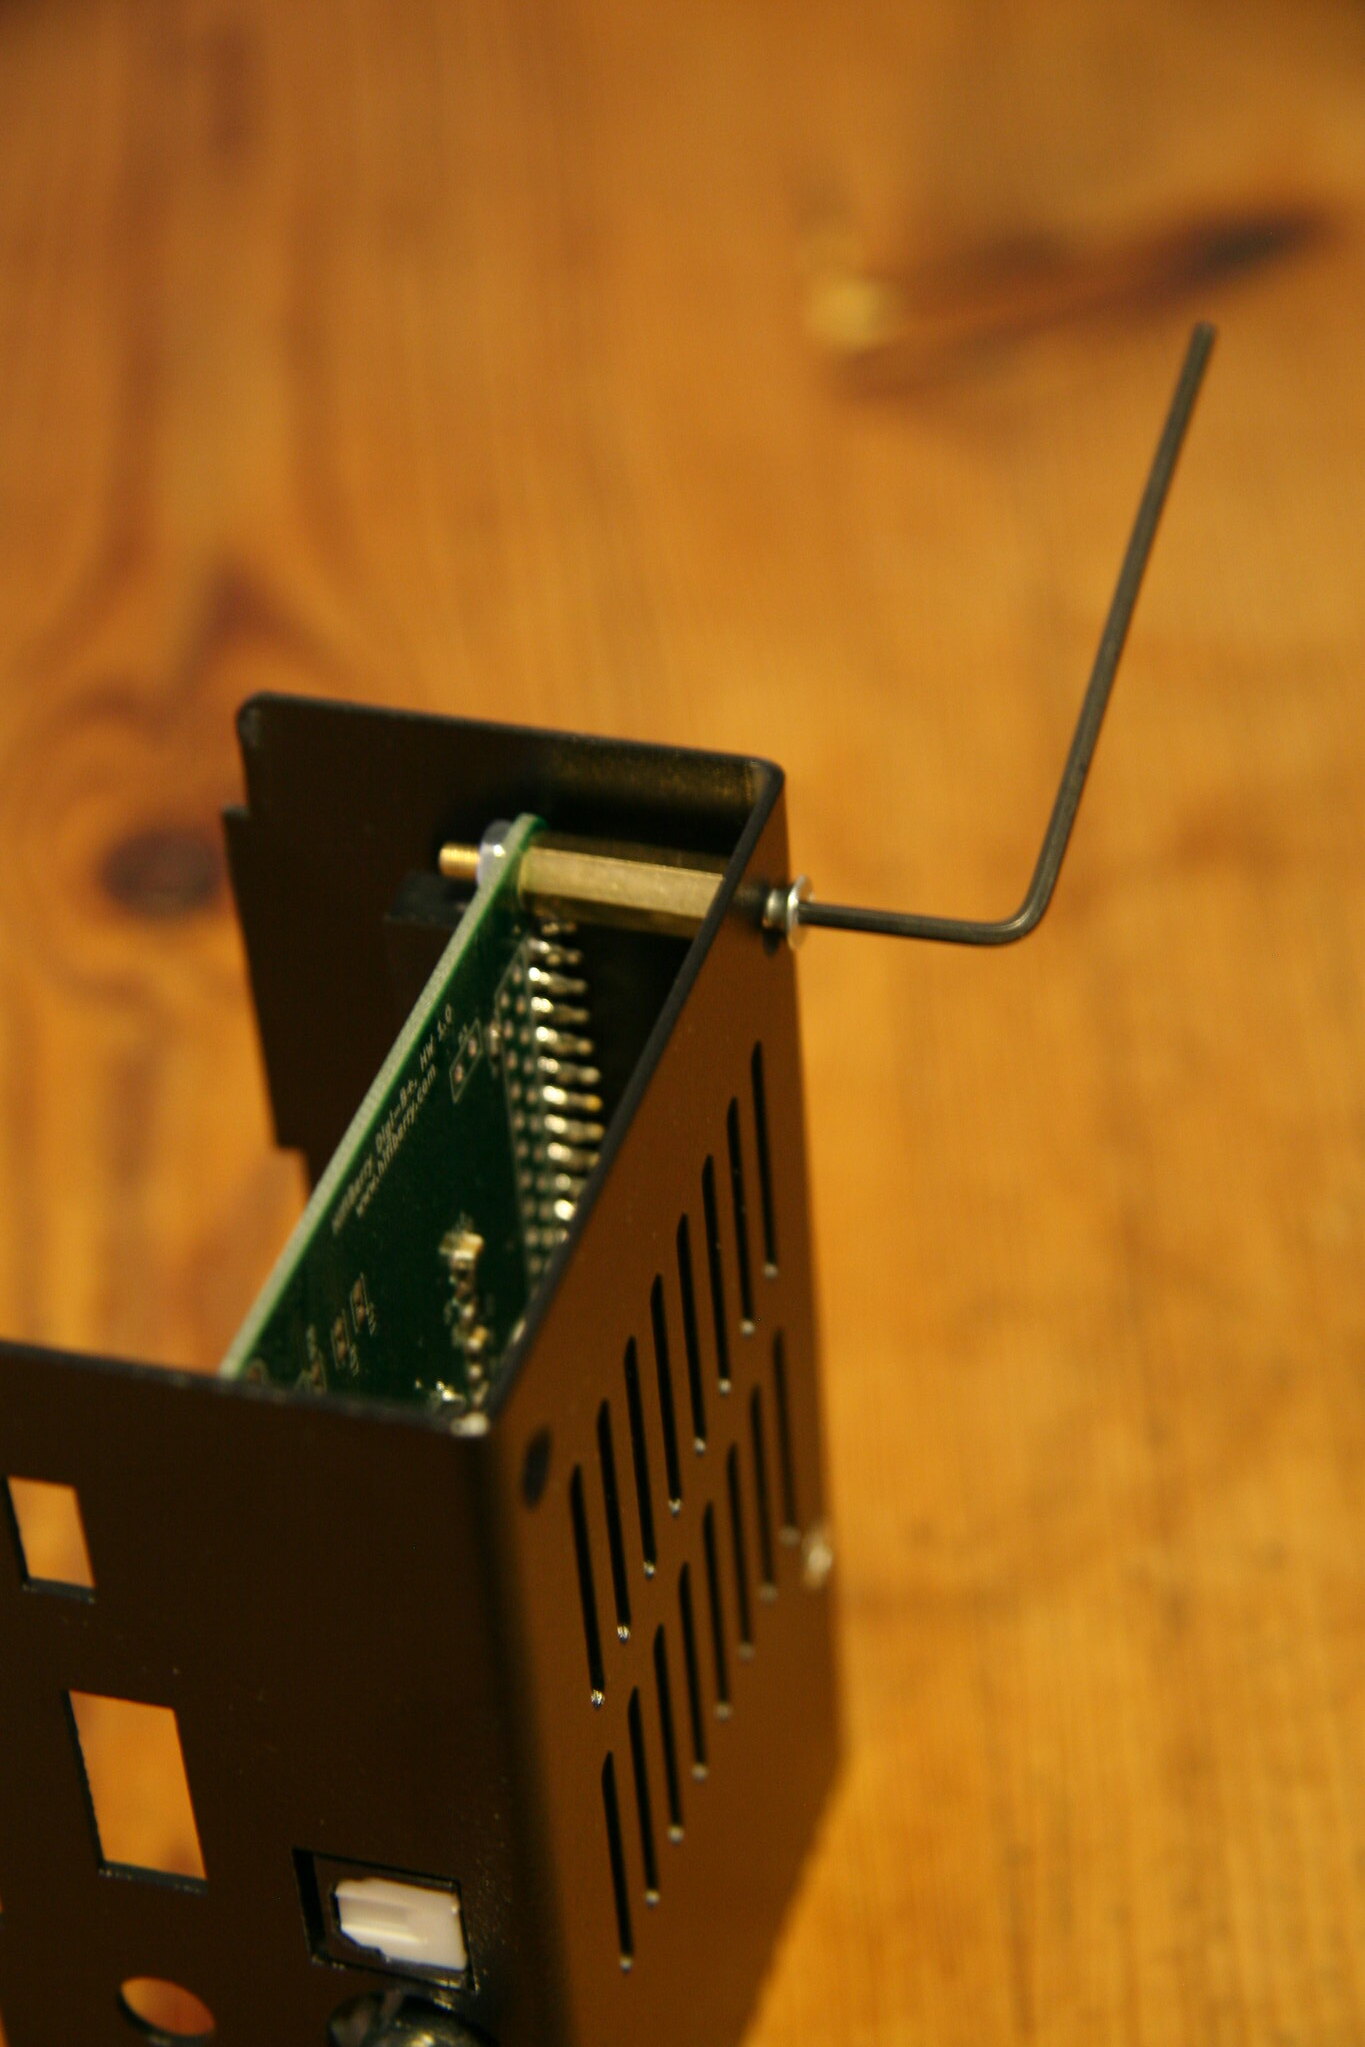
Insert the Digi+into the top half of the case. When the sockets are properly positioned in their case holes, the spacers will be correctly located in relation to the fastening holes. Take the two short countersunk screws and fasten the board to the case with the allen key.
Join the Two Halves of the Case
Push the two halves of the case together, ensuring that the sockets align with their holes and the two halves of the multi-pin connector mate up properly. You may have to gently pull the side of the case with the socket holes in it to clear the tips of the sockets. When you are sure everything is aligned, push the two halves firmly but carefully together.
Fasten Up
Take the two dome headed bolts and screw them into the two holes in the bottom of the case.
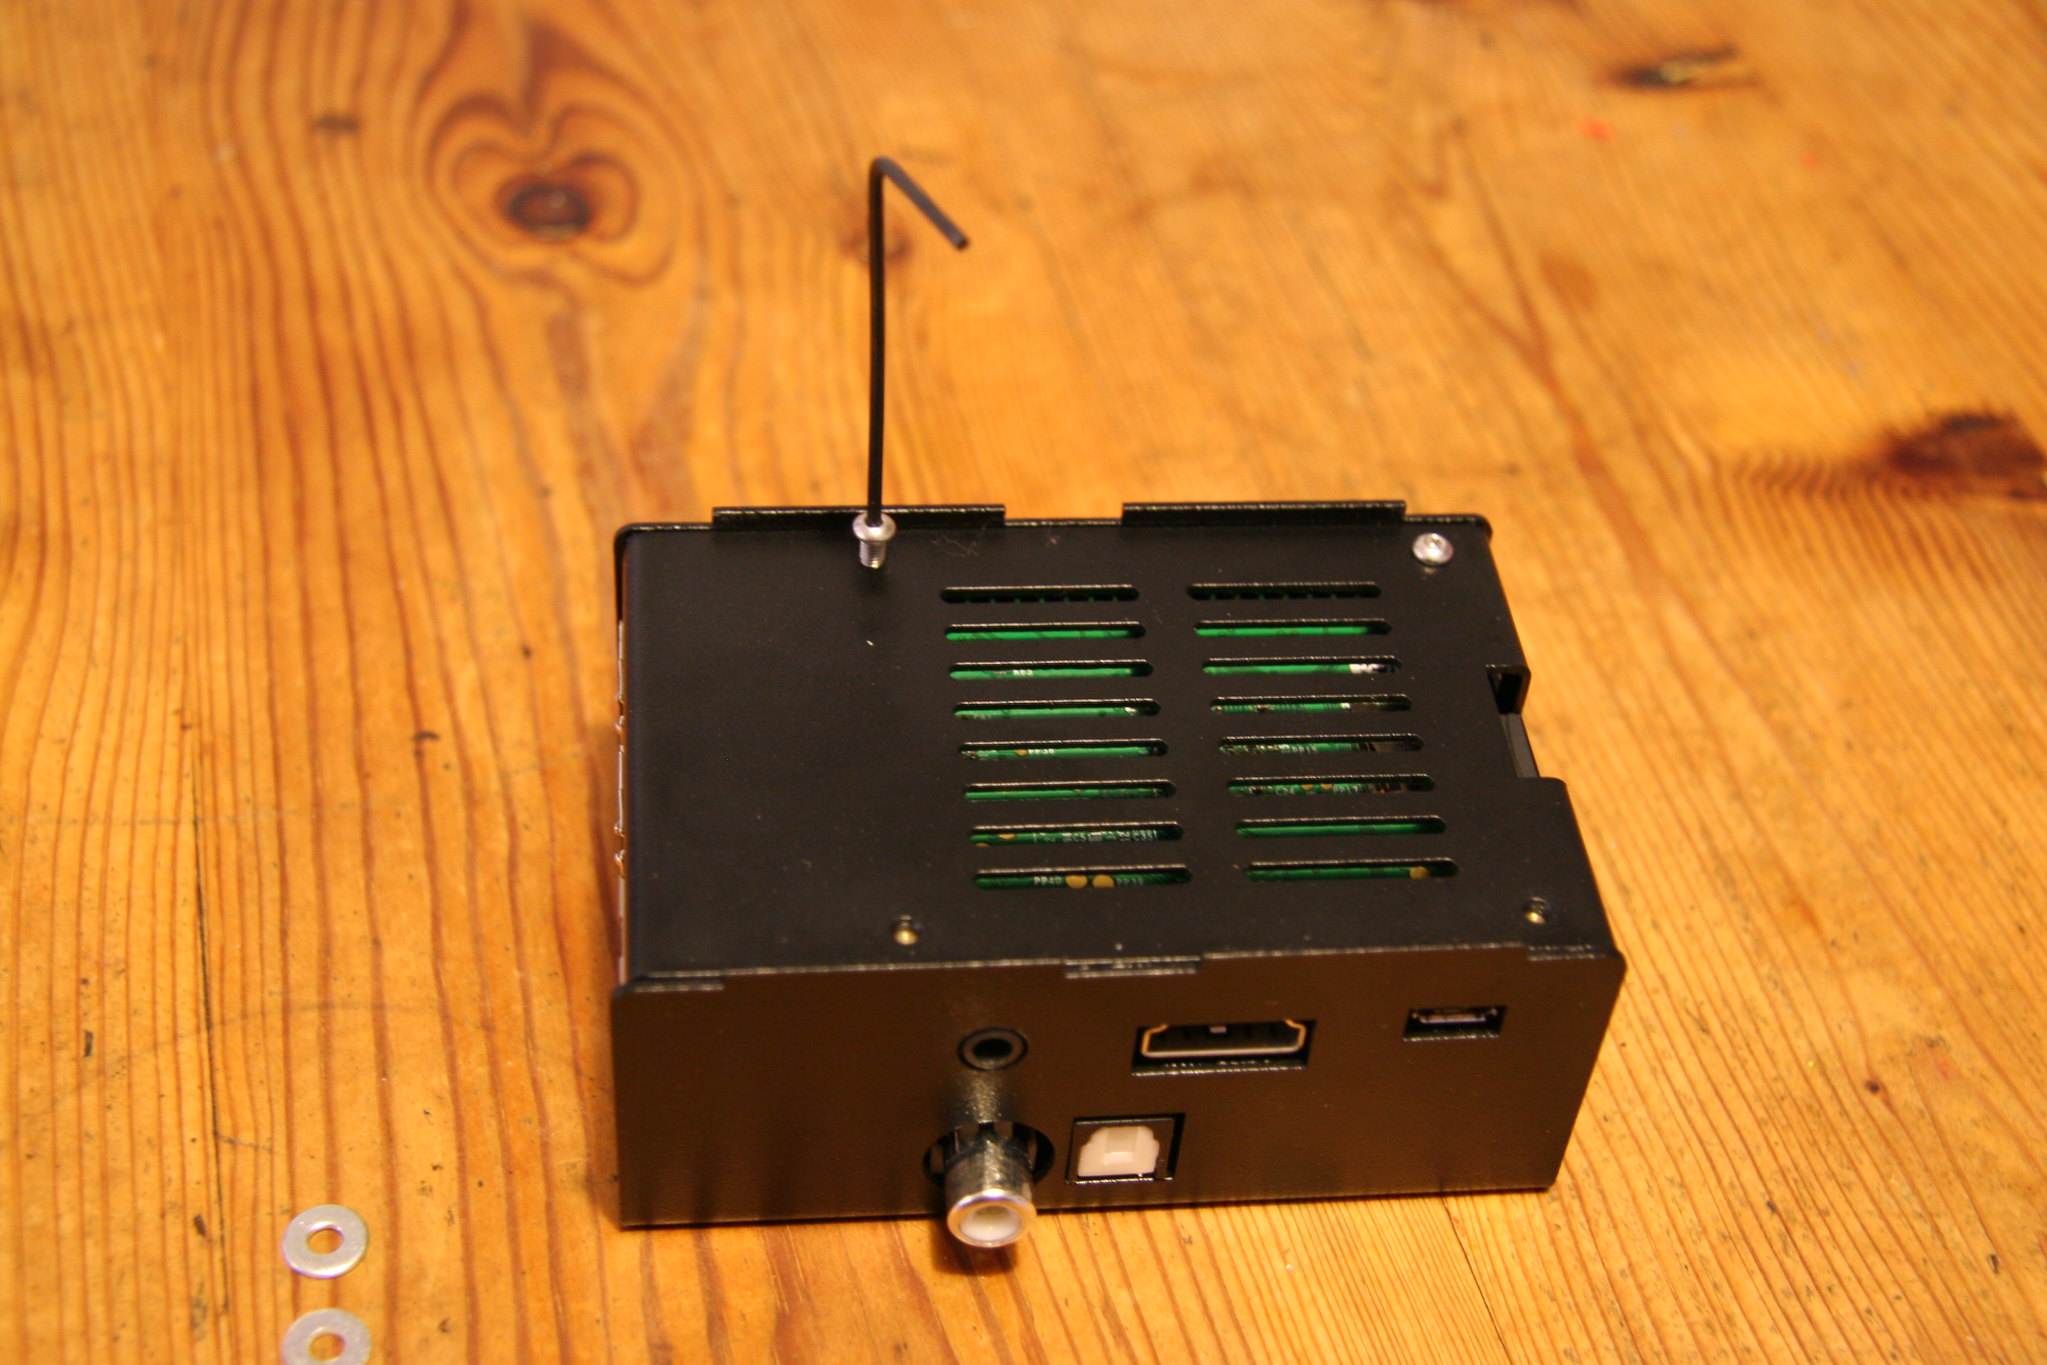
Take the remaining 2 long countersunk bolts and place them in the open holes in the top of the case. You may have to feel around a little to find the proper location with the end of the bolts - it's quite a long way into the case, which is why the bolts are so long.
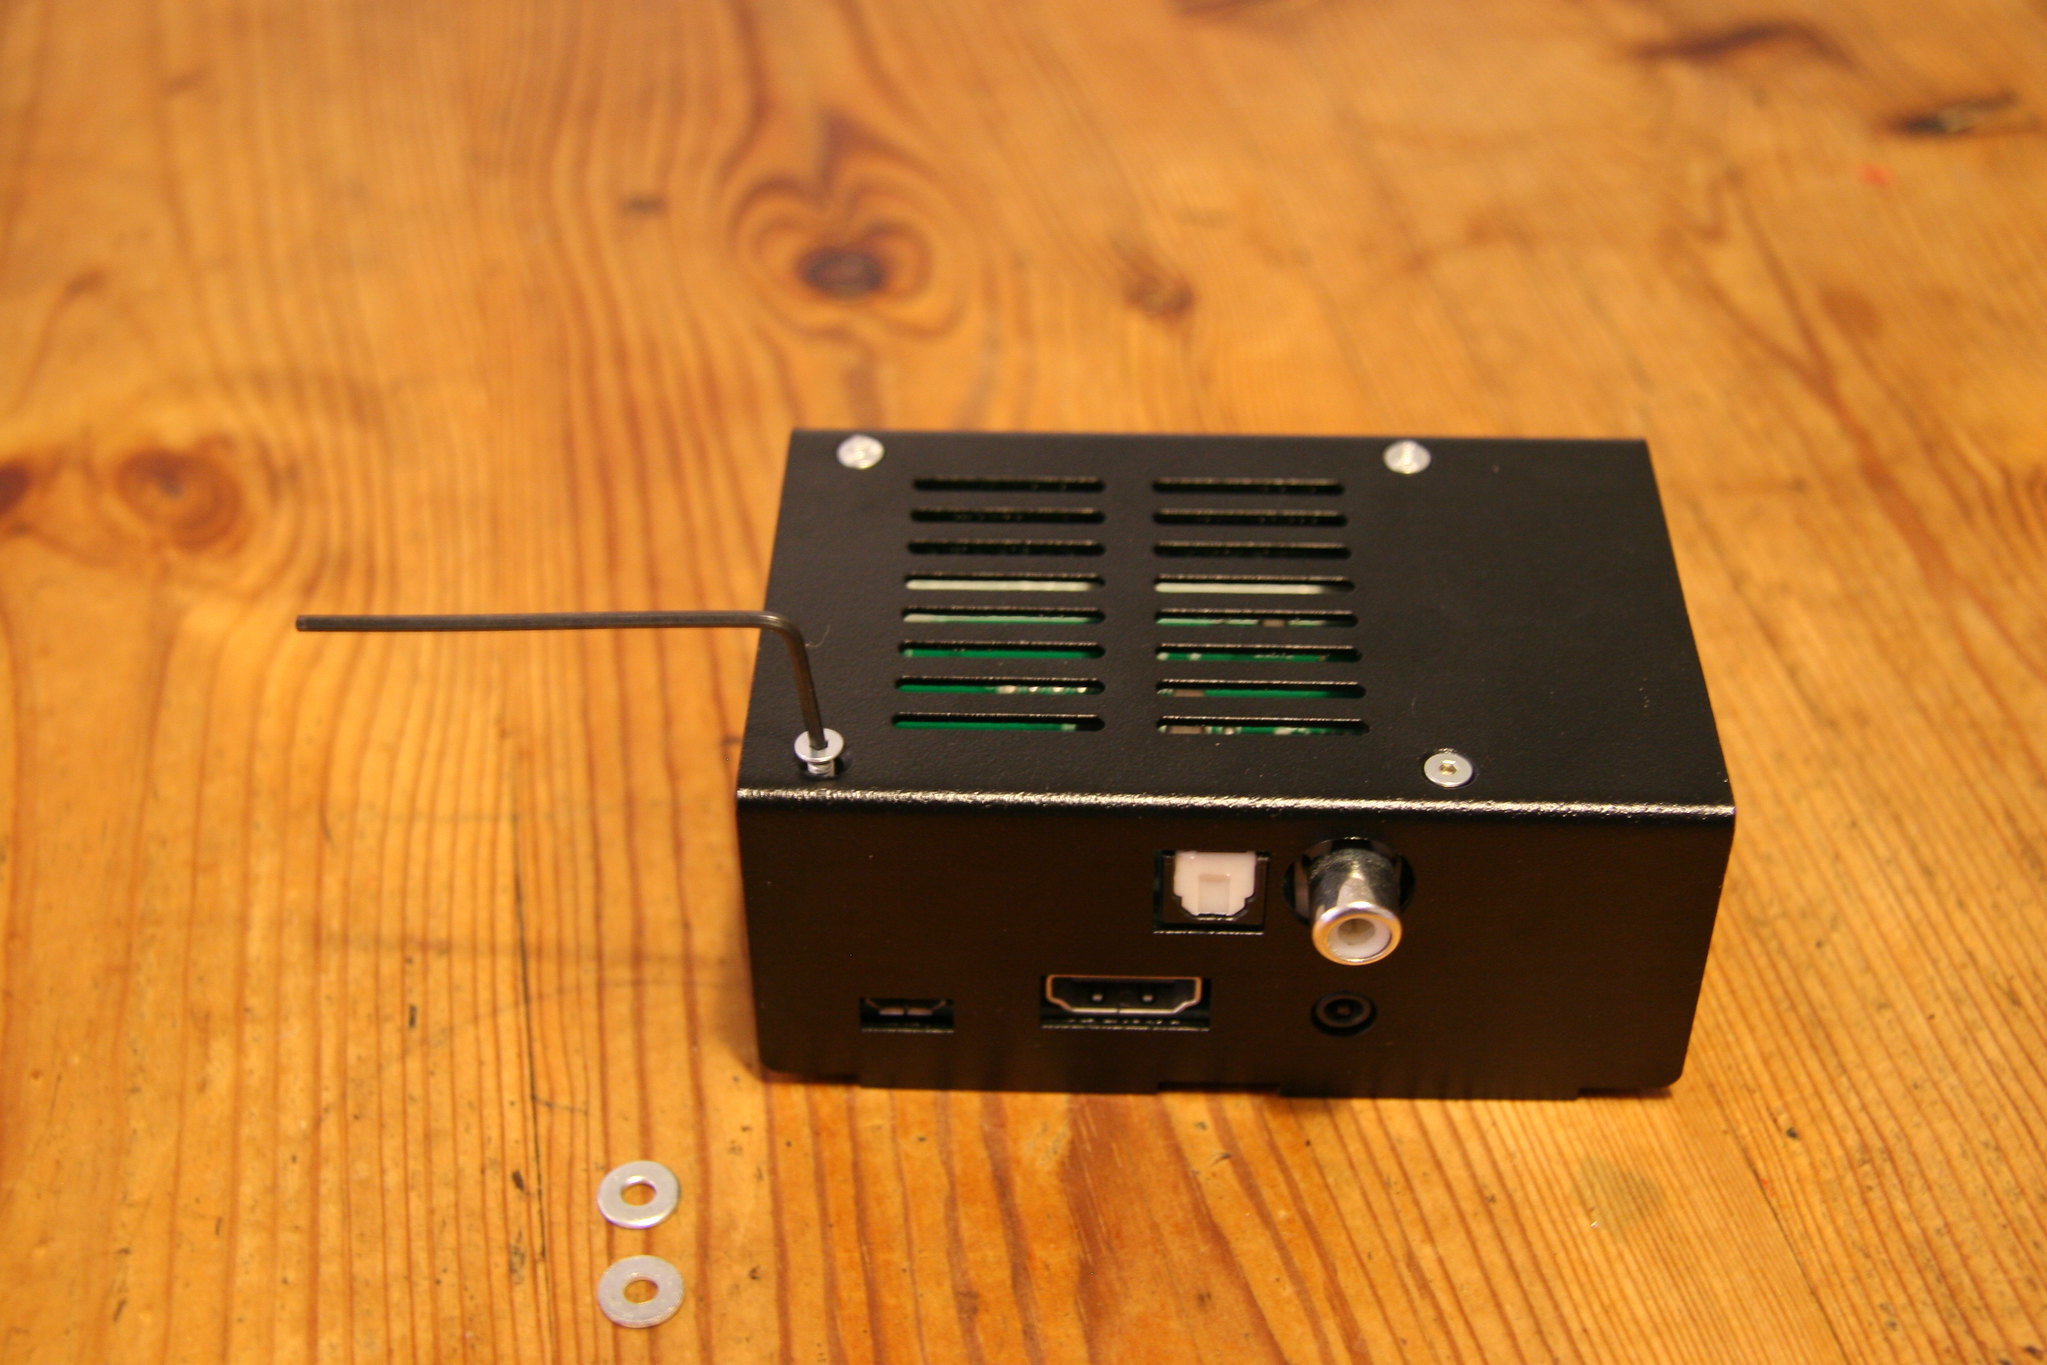
Those washers are a bit too big really for the only logical place to put them (under the nuts), so they end up being surplus to requirements. No problem with that though.
Feet
You may want to put some sort of feet on the bottom of the case. I use these little clear coloured stick-on ones.
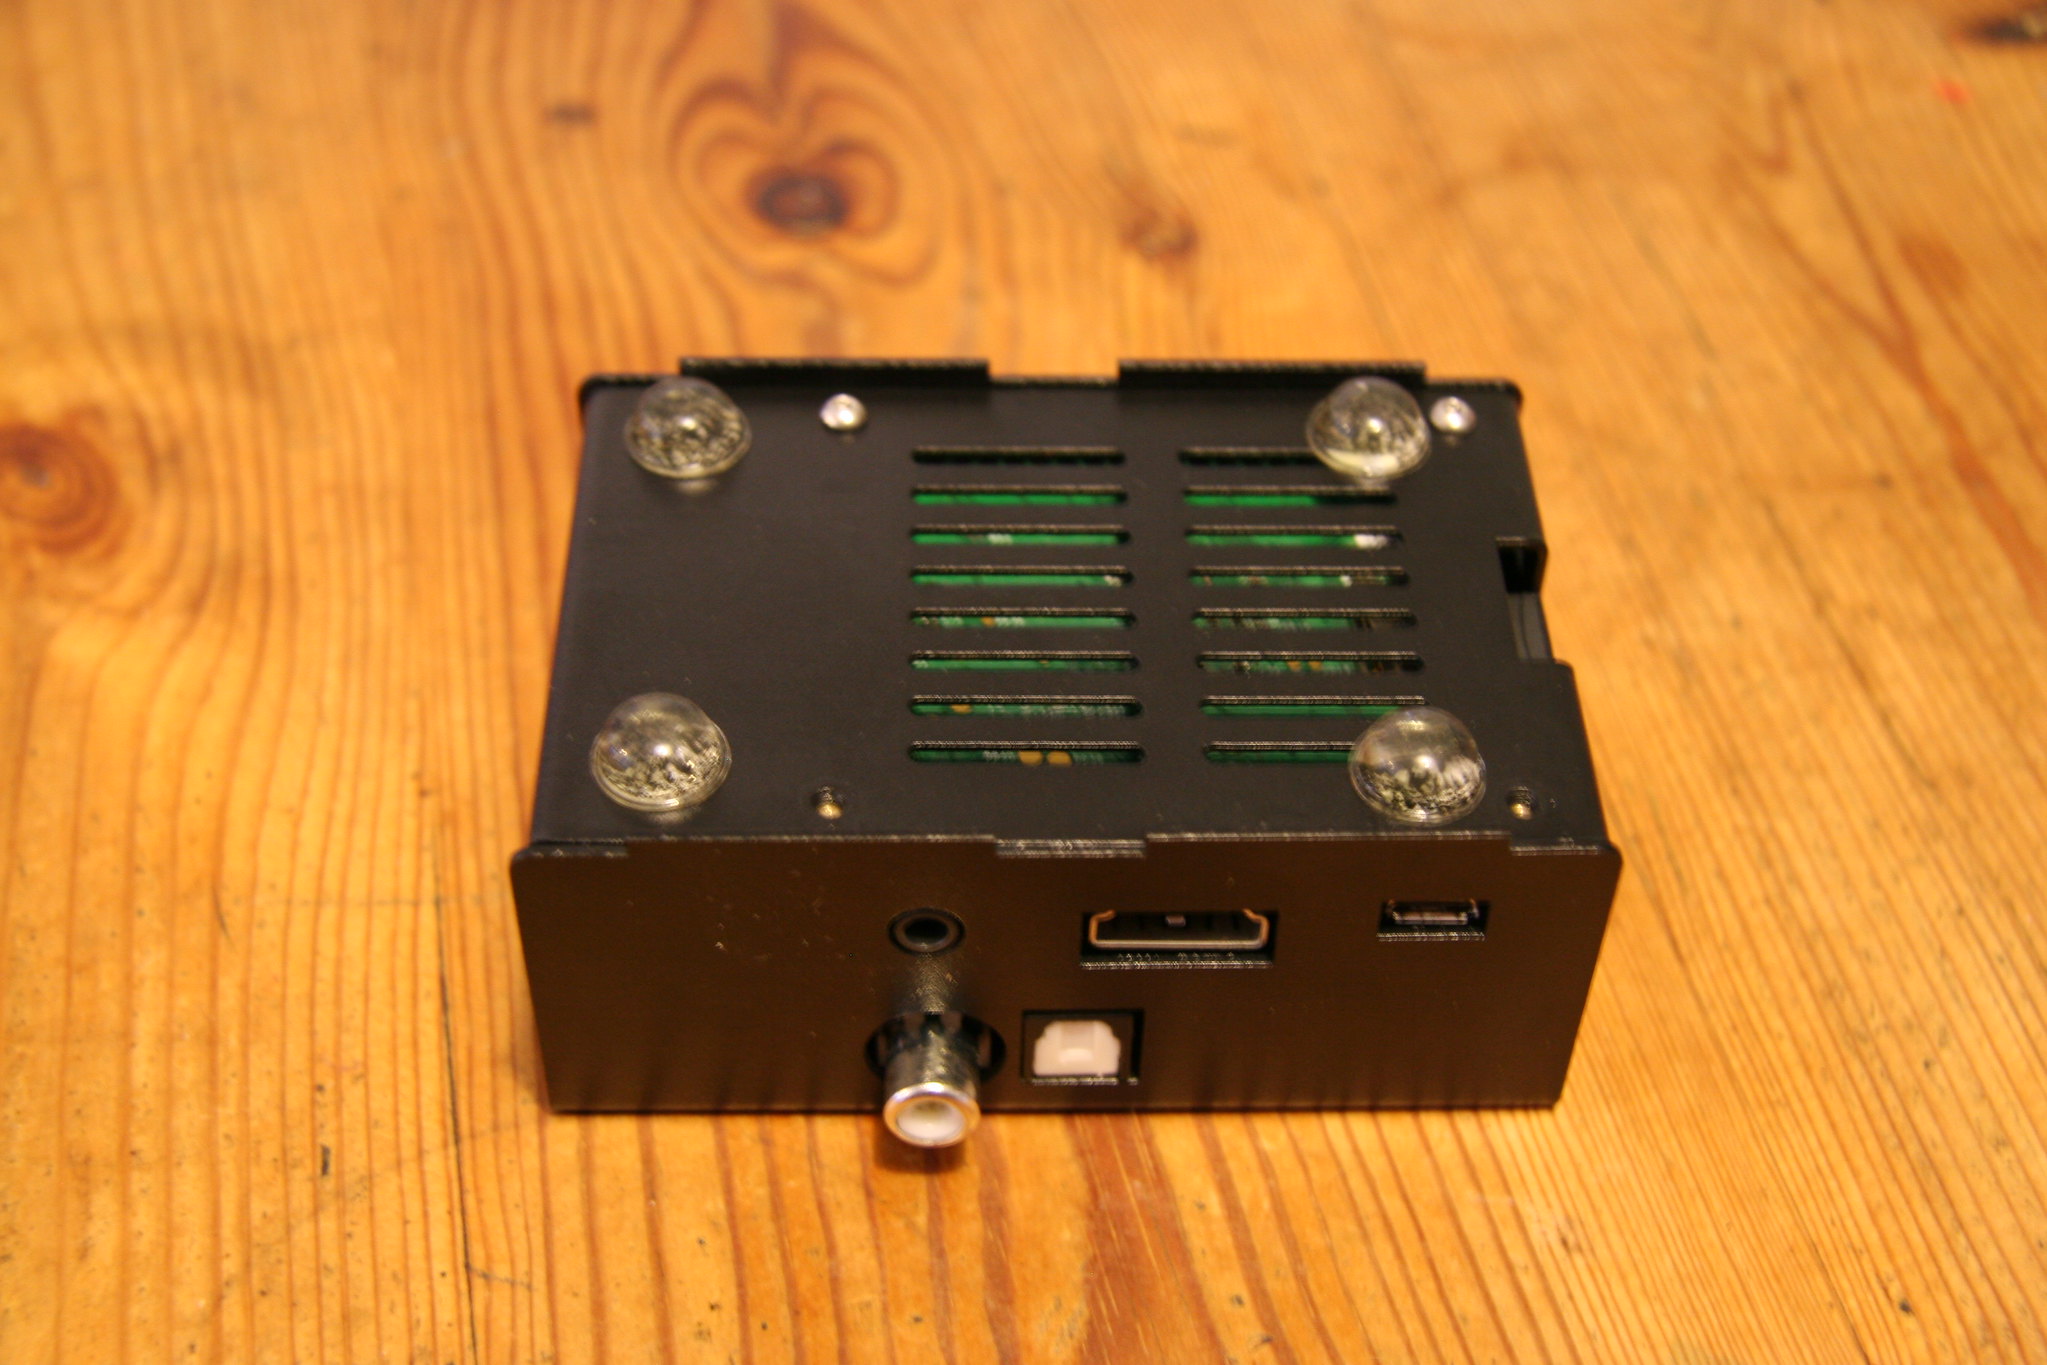
Job Done!
So, first of all, here's a link to the HiFiBerry shop page, where the case can be ordered from: Steel Case for HiFiBerry Digi+, Black
This is what we're hoping to end up with.
Case as delivered along with the Raspberry Pi and Digi+ boards
Parts
Fastenings
From left to right:
Allen key
2 x countersunk bolts (long)
2 x dome headed bolts
2 x tall spacers
2 x short spacers
2 x countersunk bolts (short)
2 x washers
2 x nuts
Mount the Pi Board
Attach the Rasp Pi to the lower clam-shell half of the case by positioning it so the sockets match up with their respective holes in the case.
Using the 2 short spacers, you'll find that when you push their threaded ends through the fastening holes in the Pi board they will line up with some threaded lugs in the case. You need to use the fastening holes on the same side of the board as the power supply and headphone sockets are located.
This photo just about shows the lugs between the board and the case bottom.
Prepare the Digi+ Board
Take the long spacers and thread them through the fastening holes in the Digi+ board - use the ones on either end of the big black multi-pin socket - and screw the nuts onto the threaded ends.
The spacers go on the top of the board and the nuts go underneath.
Mount the Digi+ Board
Insert the Digi+into the top half of the case. When the sockets are properly positioned in their case holes, the spacers will be correctly located in relation to the fastening holes. Take the two short countersunk screws and fasten the board to the case with the allen key.
Join the Two Halves of the Case
Push the two halves of the case together, ensuring that the sockets align with their holes and the two halves of the multi-pin connector mate up properly. You may have to gently pull the side of the case with the socket holes in it to clear the tips of the sockets. When you are sure everything is aligned, push the two halves firmly but carefully together.
Fasten Up
Take the two dome headed bolts and screw them into the two holes in the bottom of the case.
Take the remaining 2 long countersunk bolts and place them in the open holes in the top of the case. You may have to feel around a little to find the proper location with the end of the bolts - it's quite a long way into the case, which is why the bolts are so long.
Those washers are a bit too big really for the only logical place to put them (under the nuts), so they end up being surplus to requirements. No problem with that though.
Feet
You may want to put some sort of feet on the bottom of the case. I use these little clear coloured stick-on ones.
Job Done!


